OK, you might not be in the actual DESERT when there’s an emergency situation. But around my parts, the Pacific Northwest, it’s common to go for weeks in the summertime with no rain. I’ve lived in my city for 25 years, and over that time there’s been a noticeable shift in the weather patterns. When I first got here, the first summer we went the entire 3 to 4 month summer period with absolutely no rain at all and barely ever a cloud in the sky the entire time. After that, we’d regularly go the whole summer with little to no rain. Temperature-wise, it stayed in the 80s to 90s.

Now, 25 years later, we do get rain in the summertime on a more regular basis, but it is still very common to go weeks with no rain, and if there is rain it is a light mist that doesn’t do enough good for plants outside. And temperature-wise, it regularly gets up to and above 100 now. So even if there is a tiny but of rain, a stretch of a week or more of 100-degree weather is going to do a number on human bodies and any food plants we might be trying to grow.

This post isn’t going to cover the technology of catching rain–we covered that in a past post: “Build A Better Rainwater Harvest System”–but instead I will focus on collecting enough water to keep you alive. Humans can’t go longer than 3 days without water.

I’m also assuming here that you don’t need to be told to look in your environment for drinkable water in the form of lakes, streams or rivers. How about birdbaths or potholes? Fish tanks? Swimming pool? First things first, try to find fresh water wherever you can. If an emergency happens when you are in your home state, you probably already know where water sources are. If you’re on the road and something happens, it may be harder to find a river, lake or stream, but hopefully someone helpful will tell you. Look for areas where there are bands of trees or bushes where there aren’t any in other areas nearby. those bands of trees or bushes often grow alongside water sources.

Even in places where there does not seem to be much moisture in the air, there is always a little. A key way to collect water is to create a surface that water can condense on, and a temperature difference so that the water vapor in the air is induced to condense as vapor. Keeping a large sheet of plastic or a few plastic trash bags in your emergency kit is ideal for this. You can also create this temperature difference by collecting any moisture that is in the ground.

If you have access to salt water, you can boil it and collect the steam, which will condense into water vapor when it cools and is drinkable. This method also works with contaminated water. Based on what tools you have, you can create a “still” in a variety of ways. Take a container in which to boil the salt water. As the salt water boils, it will create steam. You want to be able to collect the steam and transfer it into a drinking container. Based on the gear you have, you might rig up a lot of ways to do this. for instance, you could cover your boiling pot with a metal screen and another cooking pot with a hole drilled into the side of it that would accept a high-temperature plastic tube. If you have a large garbage can you can place this over your whole system to contain as much steam as possible. Yes, you will lost some water along the sides of the garbage can, and perhaps you could rig up a way to collect that water as well. But some portion of the condensed water will go into your second cooking pot with the tube, and you’ll get water that way. You can buy distillation kits that will do this. They are often expensive, so if you can cobble one together yourself you’ll be better off.

You can also use the coolness of the ground to help you collect water. This is a good way to go if you do not have enough fuel to keep salt water or other contaminated water boiling. This is where it is helpful to have a large square of clear plastic sheeting and a vessel for holding your water–as large or as small as you have access to. Dig a hole in the ground, slightly smaller than the plastic you have. Dig a hole in the center of that hole that will hold the collecting vessel you have. Place the plastic over the hole and anchor it on all sides. Find a lightweight rock or something to cause the center of the plastic to dip down right above the collecting vessel. Now just wait. As the air underneath the plastic warms up, the condensation will begin to form and will drip toward your collecting vessel.

An even easier way is to simply place a clean cloth over the top of a boiling container of your water. The cloth will absorb the steam. Once the cloth has collected the steam, wring it out into your drinking container and repeat. The idea of drinking “cloth water” doesn’t sound that great, but it will work and does not require anything but cloth. Maybe the t-shirt you’re wearing.

If you have a tarp or trash bag, stretch it out on the ground and secure half of it with rocks. Fold the other half over to create a “pocket.” The vapor in the air will condense on the inside of the plastic. From there, you can carefully collect it. You can do this on a small scale, with whatever size plastic you have. Darker plastic will create more of a temperature difference and you’ll likely get more condensation.

An even simpler way to get a few drops would be to let the plants around you do the work for you. If you have an empty can or an empty water bottle with a small opening, simply place it over a plant stem or leaf of a tree. Secure it and seal it off as best you can. the plant’s transpiration will result in moisture collecting on the inside surface of your container.

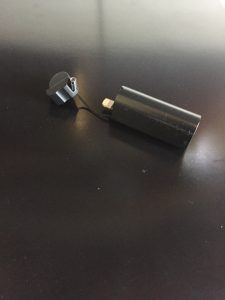
While we were at SHOT Show earlier this year in January, we met the people selling the JIT Charger. They were also selling Ron Hood survival videos (more on that later!) I got to talking with the guys at the booth and became really interested in their JIT charger. I got one and tested it out.

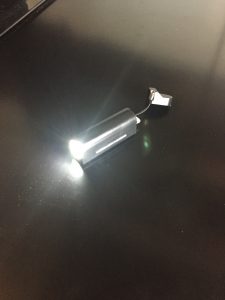
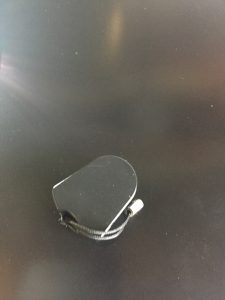
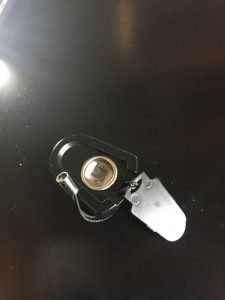
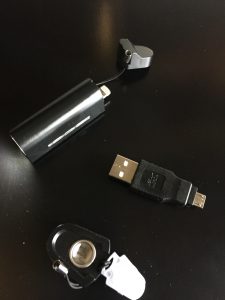
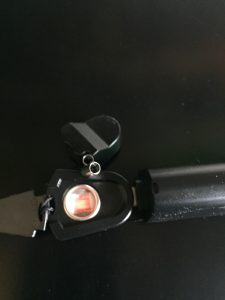
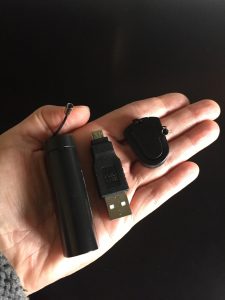
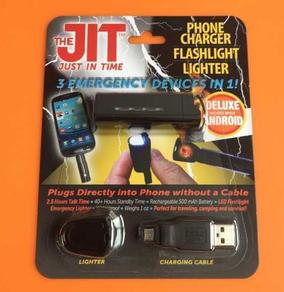
The JIT charger is an emergency power device that accepts a charge and then transfers that charge to either an Android or iPhone for battery power. It also contains an LED flashlight and an electric lighter that heats up metal coils. You could use this to smoke your last cigarette when the SHTF and you lost your lighter (unless you have this badass lighter on you) or make yourself a fire that might keep you alive until Judgement Day. The JIT is small and affordable, and does its job. It comes in three pieces: the flashlight, the lighter, and a USB that charges it. It’s light, at only 1 ounce you will not likely even know you are carrying it. The charger plugs directly into the phone with no need for an additional cord, which is nice. It’s available online for $21.49 for an Android version and $22.49 for the iPhone version.

Here’s how it worked for me. I plugged the flashlight part of the JIT into the USB on my desk computer at 11:30, and by 12:30 it was fully charged. It was actually full in less time than that, probably about 5 or 10 minutes earlier than that, but I’m not sure exactly since I wasn’t looking at it every second. I did not expect it to charge that fast. There are four green LED lights on the outside of it that show the progress visually. When it has only one green LED light lit it is only 1/4th charged. When all four green lights are lit it is fully charged. I let my iPhone 6 completely die, meaning that I let a game continue playing on my phone until it shut itself off and had no more power left. I plugged in the JIT at 1:19. Twenty minutes later, at 1:40, the JIT had imparted all of its charge (the four green LEDs had gone down from four lit to none lit) and my phone was at a 15% charge. This is plenty of charge to send a few emergency texts or make a quick phone call. The JIT will not fully charge your battery, but if it is totally dead, as mine was, it will give you enough juice to reach out for help.

I had to take my phone out of its OtterBox case in order to plug it in, but I didn’t mind doing that. It’s good to take it out of the case once in a while and clean it! Within 5 minutes it was down to 1 LED light on the charger, and the phone was at 7% charged. So you could use this to get a quick charge to make a text, and if you don’t connect with the person you’re trying to reach you could have enough power to try again a few minutes later. The packaging has actual instructions, which I didn’t read at first because I wanted to see how intuitive it was to use if I didn’t know what I was supposed to do. I fumbled a minute pressing the on button, not sure exactly how to turn the flashlight on and turn the LED lights off. Turns out, all you have to do is press and hold the button to turn the flashlight on. The green LED lights go off by themselves after 15 seconds. The lighter automatically shuts off after 20 seconds. When I plugged the lighter into the JIT it got red right away, just like a cigarette lighter.

I don’t know exactly how many lumens the flashlight is but it is bright for its size and will dispel darkness enough to get you somewhere. I turned on the flashlight at 3:00 pm, and left it on the whole night while I was sleeping. By the next morning at 9am, it was still going strong. That’s a minimum of 18 hours of light. It could have kept going for a lot longer than that but my son got a hold of it and started playing with it, so I’ll have to test it again another time!

One drawback is that the three pieces are small so it could be easily lost or broken. I’d like to see the JIT come with a small case or carrying bag to better enable keeping track of them and keeping them all together. You can’t connect them all together, because then the charge from the charger will go into the lighter. You can connect the flashlight piece and the USB piece and keep those together. Both the flashlight piece and the lighter piece came with a small carrying loop so that it could be hooked to a keychain. The charging end of the flashlight had a cover that remains connected via this loop. The flashlight part requires a lithium ion battery, which is included.

There are a lot of chargers you can get out there, and many of them cost a lot more than the JIT. But I like the JIT because of its simplicity, its small size, and its affordability. This would be a very easy thing to keep in your purse, at work, or in your car in case of any power emergency, and for the price of three JITs you’d spend less than some other chargers that may or may not work as well as they say they will (read our comparison of smartphone power banks). Many smartphone chargers simply do not provide as much power as you think they will, and, they don’t have the flashlight or the lighter feature.

I’m the kind of person that keeps my phone fully charged at all times in anticipation of emergencies when I won’t be able to charge it. I have to admit that it made me nervous to let my cell phone dwindle its battery all the way down to nothing and then shut itself off! But the JIT came through, and when I plugged my phone in to charge back up, I plugged my JIT in too, so it’s ready for next time.

Buy the JIT from thejit.com

I like vehicles. Yes, I drive a car everyday to and from work and everything else. But our everyday car is not the type of car we dream about. Last year we wrote about the Ripsaw EV2 Supertank, and we’ve discovered another drool-worthy vehicle we have to tell you about.

Check out the Sherp ATV. It’s made in Russia and can go nearly 4 miles an hour, although the videos (on the website’s media page) make it look like it’s going much faster. 4 miles an hour is faster than a person can keep up with walking for very long. And with this ATV’s off road capabilities it won’t matter what kind of terrain you’re on. The rate of movement is a little confusing. The video shows 6 km an hour which is 4 miles. But the spec page says the max speed is 45 km per hour, which is nearly 30 miles per hour. Another site I found says it can go 4 mph in the water, so maybe that’s the difference. I think something is getting missed in translation there.

According to the website, the company first started designing an unequaled ATV in 2012, and has refined their design over the past 3 years. The newest version climbs over vehicles as high as 3 feet (1 meter) and at inclines of up to 35 degrees. “Geologists, oil workers, fishermen, hunters thrill seekers and discoverers” have all put the Sherpa ATV to use.

Price tag: about $47,000. I don’t know…I might rather spend that money on a really nice RV with a kitchen and bathroom. What do you think?

Sherp ATV

Images from sherp.ru

Depending on where you live, you might need to cross water to get home or to your safe place in the event of a social or natural disaster. I live in the northwest, where there are two major rivers that bisect my town. Depending on the way I drive home, I may need to cross one, two or three bridges. I currently don’t have a water craft in my car kit, but I’ve thought about it.

I guess if there was a disaster, I’d hope that someone with a river boat skiff would be so kind as to ferry people across. I know that’s probably not very realistic. What stops me from buying a water craft, I guess, is the cost. Is a blow-up raft worth it if I keep it in the car and may never use it? I mean, they’re not super expensive. But a good one is also not super cheap.

I don’t know. Perhaps I’m getting closer to making an investment in some sort of water craft as an emergency device. Here’s this canoe I found…isn’t Kickstarter amazing?!

The “origami canoe” is in the pre-order stage. It’s called MyCanoe and it’s supposed to easily fold up into a small box that you can carry around or pack. The body of the canoe is made of custom polypropylene. There’s also a MyDinghy made of the same material. It has a 15-year UV treatment that is rated to 20,000 folds! I don’t know how the rate UV treatments based on folds, but that’s what the website says.

The 14-foot canoe assembles in 10 minutes, and folds back into a 37 by 25-inch box in 5 minutes. Given how many tries it takes me to fold a map, I’m just going to go ahead and double both of those times. But still, that’s pretty impressive.

MyDinghy is 9.4 feet long and 37 inches wide and weighs 52 pounds. It folds into a 37 by 8 by 25-inch box. The canoe is 14.7 feet long and 35 inches wide. It folds into a 37 by 8 by 25-inch box. The canoe also weighs 52 pounds. The canoe costs $1,400 with an $840 pre-order and the dinghy costs $1,350 from OriCanoe. The blow-up raft is starting to look a lot more affordable. But at least with this canoe, I wouldn’t be tempted to keep it in the trunk of the car and never use it!

MyCanoe Folding Origami Canoe
MyCanoe
MyDinghyCase
MyDinghy folded into a case

Images from oricanoe.com


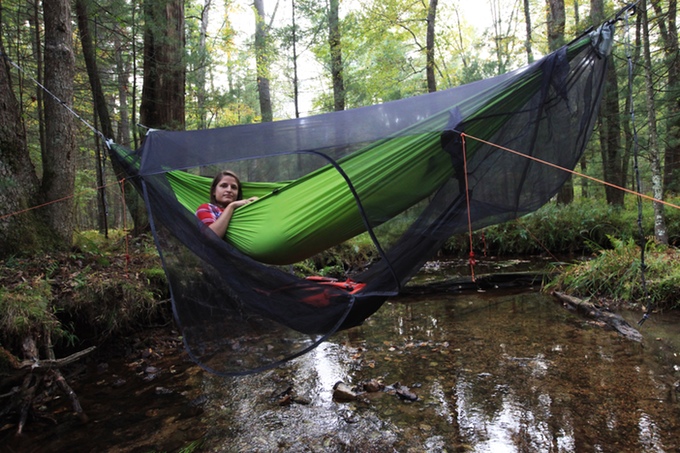
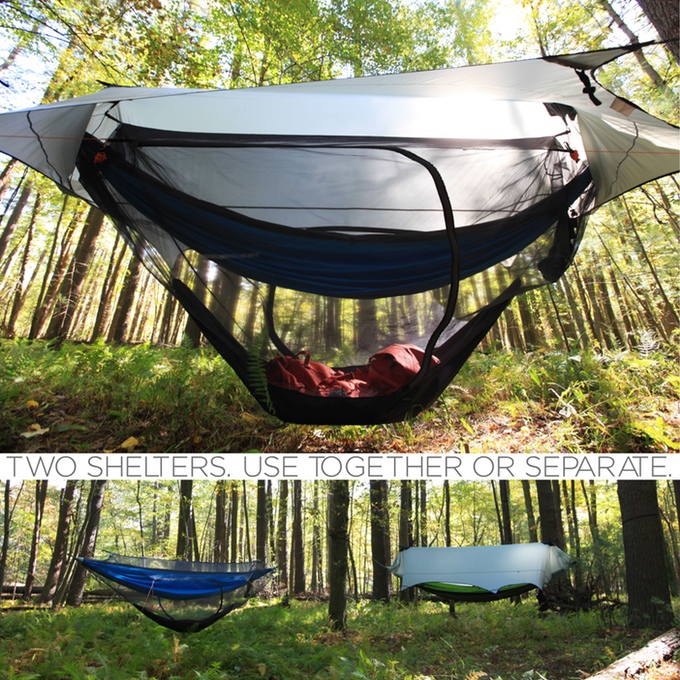
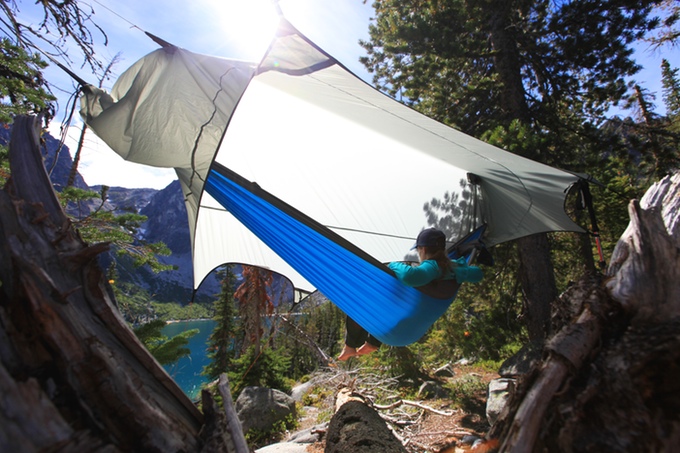
It’s only December, I know. But when I found this Nube Stratos Hammock Shelter by Sierra Madre Research on Kickstarter, my mind immediately went to June. By a lake somewhere, in the mountains. No one else around for miles. Maybe I have a tent and maybe I don’t. With this hammock shelter, I don’t really care.

I love this because it’s a hammock. And sleeping in hammocks has always been fun for me. But it’s also great because it keeps you and your gear elevated and dry. No need for ground tarps. You won’t be sitting on a puddle of water that’s going to try to seep into your tent seams if it rains. The Nube Stratos is set up to cover you in 360 degrees from rain and wind. Insects too. Up 10 100 pounds of extra gear beyond the weight of the user can fit in the Gear Stash section underneath.

One layer made of 15D Nylon Ripstop is called the StratosFly. It protects against the elements. The StratosShield, made of 15D Quad-layered Lockstitch mesh, protects against insects.The Nube Stratos is offered at $308. Lots of cool add-ons make this even more useful. for instance, for $15 you can add on a storage line and pocket. For an additional $105 you can add a floor, to turn the whole system into a ground tent. This will be particularly useful if you’re in a place where there’s no trees, or you can’t find two that are close enough together. Altogether, $500 or so for a really useful, modular, customizeable tent available in three colors seems a pretty reasonable purchase.

Images from Nube Stratos on Kickstarter

Whether you’re a man or a woman, if you’re reading this site we know you want the best gear out there. Valentine’s Day is coming up. Who wants a box of chocolate, I mean, really? A piece or two, maybe. But I’d much rather have a sharp new knife or a ram’s head bottle opener. Take a look at these Valentine’s Day gift ideas for your outdoor gearhead and let us know which you chose.

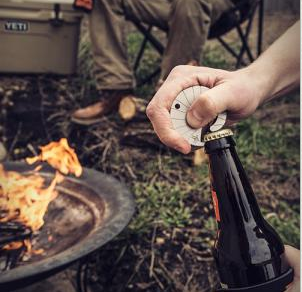
Vortex Ram’s Horn Bottle Opener

Vortex, the fine optics company, created a bottle opener that looks like a bighorn sheep horn. It works really well too. It looks cool and is fun to use. ($13)

Pine Tar Soap

My man has a big, full beard. It can get scratchy at times, even though I love it. There’s this soap that’s been made the same way since 1878. It’s literally made from pine tar and smells like a campfire. The soap–there’s also shampoo–conditions a man’s beard. People who use it say it doesn’t dry their skin out like other soap, it smells good and it lathers well. I’m lucky that a store near where I work stocks it, but you can order it online if you can’t find it near you. (about $4 for a 3.25-ounce soap bar; about $10 for 8 ounces of shampoo)

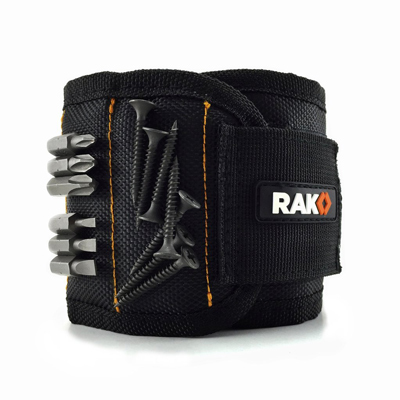
Rak Magnetic Wristband

I want one of these Rak Magnetic Wristbands for myself! How many times have you been trying to hang a picture or screw in a bookcase or something like that and you put the screws or nails in your pocket. Then you have to take your free hand off whatever you’re doing and dig around until you find the tiny thing. There’s a better way! This wristband is embedded with 10 strong magnets, making the entire wrist a work zone for holding small metal items. ($13)


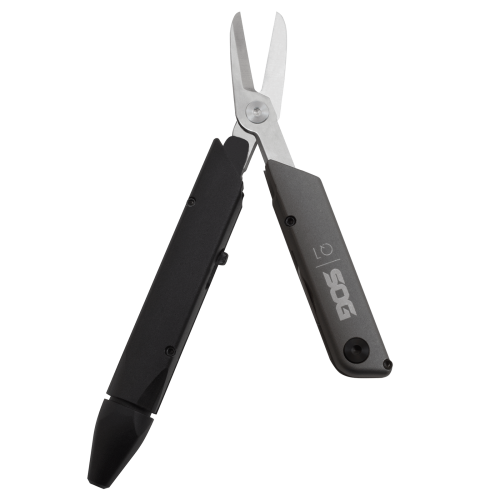
SOG Baton

We already wrote about the SOG multi-tool that can be turned into a belt buckle. We heard about their new Baton series at SHOT Show. It’s not quite ready to be released to the general public yet, so this may be a better gift for a birthday later in the year or Christmas.  They are small multi-tools with a minimalist design. They’re meant to have all of the functionality of a full size multi-tool but in a smaller, more discreet form. They’re more travel-friendly and even work-place friendly because it’s not so obvious you’re packing a bladed tool. Shown in the photo is a Q1 Baton. This comes with a ballpoint pen, bottle opener, flat screwdriver and scissors for $54. There’s also a Q2, Q3 and Q4 with various increasingly advanced functions. The Q4 has pliers, gripper, soft wire cutter, straight blade, file, can opener, small and medium flat screwdrivers, bottle opener and magnetic ratchet driver plus magnetic 12-piece hex bit kit for $120.

Let’s say you’re on the hiking trail and some creep starts getting too close. Or let’s say you’re at the grocery store and some creep starts getting too close. Here are 5 ways to take an attacker down if you can’t avoid them.

1. Use a stick. Many readers of this site probably have a gun, or two, or several. But you might not have it on you and you might not want to use it. If you’re hiking, take along a sturdy walking stick. If you don’t have one, at the start of each hike pick up a sturdy branch along the trailside. Just seeing that you are carrying a small battering ram might dissuade someone from messing with you, but if not, you can use the stick like a bo, like this guy. Wacking someone in the kneecaps is gonna hurt.

2. Move in the attacker’s direction.
If you’re carrying a heavy pack, use your extra weight to your advantage. Instead of resisting the attacker’s force, throw your weight onto him. You’ll throw him off balance, hopefully enough for you to recover and get farther away from him.

3. Jab for any soft tissue.
 I recommend carrying a knife with you for protection, and learning how to use it if you have to. But if you’re not armed, practice stiffening and straightening out your hands to jab at eyes, nose, throat, groin, and any “soft tissue” place you can reach. A palm strike to the nose can immobilize a great white shark, and just about any attacker. It won’t stop them completely, but it will give you time to get away. A kick to the groin will drop just about any man.

4. Snap his fingers. 
When someone reaches their hand toward you, grab one or two of their fingers and apply pressure downward (backward). Once the fingers won’t bend anymore, keep pressing. this causes intense pain and can cause them to release their grip. If they do continue to attack you, they might be able to do a lot less damage with one or two broken fingers or a broken wrist. Once he buckles to the ground, follow up with a chop to the ears or a knee to the nose.

5. Carry pepper spray.
Tear gas or pepper spray is “non lethal” but is a good defense. They may be illegal in certain states, so check to see if you’re allowed to carry this. If you do carry it, keep it in your hand. If it is in a bag or purse, you simply won’t have time to get to it and activate it if you’re in the middle of a surprise attack. Direct the spray right at the attacker’s face at close range. Pepper spray has a blinding effect, so this may buy you time to get away or get out another weapon. Be aware that if you spray against the wind, the spray will come back at you too. after you spray, avoid contact with the person, if you can, because the volatile oils will rub off on you. If you get some on your hands and then rub your own eyes, you will be debilitated as well.

The Northwest where I am is typically not known for harsh, snowy and icy winters. In recent years, though, that has changed and we’ve gotten more snow and ice days, which result in school closures, road closures and businesses closed around the state. I don’t know if it’s global warming or what, but the last few years we’ve gotten severe ice storms that have wiped out power to thousands of people and caused havoc on roadways. Read this post from Rick, our search and rescue guy, on what he has learned from the recent winter storms we’ve had.

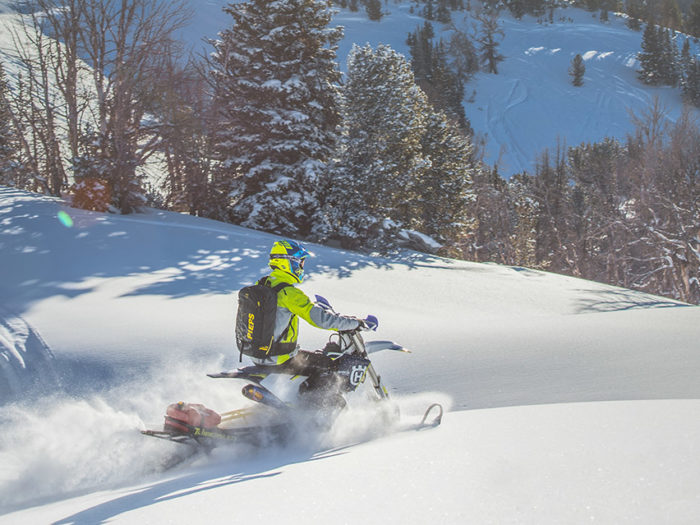
I’m all for being cozy inside the house on a stay-at-home snow day, but here’s what I really want to be doing: riding on a Timbersled snow bike. Oh my gosh, look at how fun!


The Timbersled ST 120 has a 120-inch track and a backcountry ski on it. It’s the “do everything and anything you want on snow” bike. Snowshoes and skis are fun and all, but this will get you places you could never get on anything else. Check out the specs on this monster.  How it works is you take your motocross bike or off-road dirt bike and attached a Timbersled system to it. The system incluces a front ski and a rear track system that replace the tires on your bike. You can ride all year. You need to get an Install Kit for your type of motorcycle, and then you’ll living your white powder dreams. Prices start at $5,300.

Timbersled ST 120 Snow Bike

Images from Timbersled.com

Don’t we all want to make it easier to just pick up and go? When it’s Friday and you’re ready to head out of town you want to be able to just head out of town. Not go home and sort through all of your camping gear and pick out what you need on this trip, then go to the grocery store and figure out where you’re gonna go. This Tvan MK4 by Track Trailer makes it super easy and is cool as heck. In fact, it’s so cool it’s been Camper of the Year by two magazines in 2009, 2011 and 2015.

The Tvan was first released in 2000, so it’s been tried and tested. It’s made by an Australian company who is known for distinctive design and  off-road capabilities that would put some ATVs to shame. The MK4 is the latest version of this ultra-cool camp trailer and here’s why we like it. The camp trailer has a deployable tent that doubles the living space and a shade awning.

Believe it or not, a queen-sized mattress fits in the space with a large storage area underneath it. The large glass window is tinted for privacy. A 108 liter water tank (28.5 gallons) holds a good amount.

For this new version, the company has made the body sleeker. It’s got more storage and weighs even less.

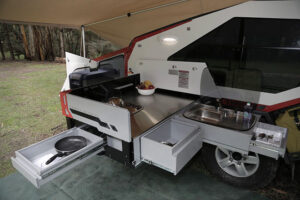
They’re offering two kitchen options: the Classic Kitchen, with a two-burner stove, integrated sink, pull out sink and cutlery drawer. The Premium Upgrade Kitchen offers 30% more storage locker space than the classic and twice the bench space. The Premium kitchen has a three-burner stove and a glass-topped stainless steel cooktop that’s probably way nicer than the one you have in your house. It comes with a bottle opener, folks.

There are many options for customizing so Track Trailer doesn’t give pricing. Instead, they want people who are truly interested to get in touch with them so they can give you all of the options to make a plan for this ultra cool camp trailer that is just what you want. I poked around a little, though, and found some prices. Hey, it’s a dream.

Images from tracktrailer.com.au

When I was a kid I loved the decoder rings that were in cereal boxes. I loved to check out books on spy games from the library. I longed for someone to leave me coded messages taped under a park bench, or a rolled up super-secret message stuck into a crack of a brick wall around the corner from my house. Of course, given the fact that I was an only child and the spy agencies of the world weren’t interested in me, I had no one to play these spy games with. But my love of spy games never went away.

With spy coins, hollowed out coins that you can put things inside, I just might start playing again. During the Cold War, hollowed out coins might contain poison, for self-inflicting or to inflict on someone else. Maybe they would contain some sort of mini map to a hiding spot, or a piece of a secret code. Coins are common, so it doesn’t seem odd if someone has a pocketful of coins.

Spy coins like these by CCS Spy Gear are machined from actual coins. They look and feel just like real coins, and the naked eye can’t tell the difference. An opening device is required to open the coins, so the coins don’t accidentally open. Without the opening device, CSC Spy Gear’s description says the coins are next to impossible to open. Put in your mini SD card with that stuff you don’t want anyone else to see, and no one will know it’s there. Just don’t accidentally spend it!

The hollow quarter spy coin is only $23. Yeah, I’m going to have to start playing again.