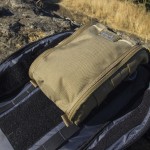
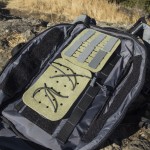
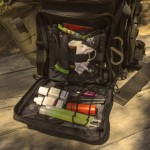
I’m a big fan of fixed blade knives. I carry one hiking (a Gerber Prodigy in case you’re wondering) and it’s an essential part of my SAR mission kit. They’re handy for anything from prying to cutting rope and webbing. They also serve well for survival tasks such as shelter building and  fire making.

There are situations however when a larger blade is called for. While utility knives with blades from three to six inches can accomplish these chores, larger and heavier blades can perform them more efficiently and for longer periods of time. They are also needed for winter survival situations where more wood is needed for larger fires and more durable, insulated shelters. Large survival knives and axes are often the tools of choice for such tasks.

But which one do you use?

Axes
Axes are tried and true outdoor tools. As the years go by, designs have been improved and revamped for bushcrafting and tactical applications. Different companies and designers will offer radically different options. Some hatchets and tomahawks will be for outdoor and survival use while others tailored for prying, breaching and combat.

Axes offer some distinct advantages. They are heavy and the mass behind the blade allows for good chopping to make kindling. Choking up on the head gives better control for finer tasks such as tinder preparation. Some hatchets will have secondary blades behind the primary edge specifically for detailed work.

There are downsides to consider. The head-heavy nature of axes requires care as they can be difficult to control when chopping. Safe use requires proper stance as well as placement of whatever the user is cutting. Another disadvantage is the cumbersome nature of the tool. While finer tasks can be done for fire making and shelter building, food preparation and other detailed work may require a small knife to achieve even for experienced users.

Large Survival Knives
I define a large survival knife as a knife with a blade that is between eight inches and twelve inches long and 3/16 of an inch thick or greater. These knives are shorter, but thicker and than most machetes and usually have a harder steel.

Large survival knives can accomplish a large variety of tasks from shelter building to food preparation when properly handled. They can chop wood as well as split kindling using a batoning technique. Some knives are made with finger choils that allow the hand to be placed forward closer to the blade for fine tasks.

Some also allow the user to easily lash the knife make a spear if the situation calls for it. Knives also tend to be lighter than hatchets and tomahawks.

There are some disadvantages to the large knives. Safety is an obvious issue when it comes to chopping and tasks where your body is close to the blade. Another common issue is quality and construction. Ergonomics are incredibly important in the handle and some manufacturers create handle shapes that create quick fatigue in the hand during use.

Which big blade to put in your outdoors or survival kit is up to you. Be sure to choose a good manufacturer and that the steel and sheath are both strong. Also consider your current set of skills and how well you will be able to use the tool to accomplish your tasks in a stressful environment.

The expert team at Vanquest has done it again. They’ve given us a lightweight way to attach existing MOLLE gear and other items to a hook and loop surface that doesn’t require any new purchases. We put it in the hands of our gear tester to see how it works in the wild.

Tactical nylon companies have recently been expanding their selection of packs and bags that carry internal hook and loop panels for attaching pockets and pouches for organization. Some will offer items that scrap traditional admin pockets for hook and loop.

An Economical Solution to a Tactical Problem

The advantage to this is that the end user can completely configure the bag or pack to meet mission requirements down to the finest detail. The disadvantage is that the end user needs a separate set of hook and loop backed pouches to effectively use the product since MOLLE pouches will be incompatible.

Quality nylon gear isn’t cheap and many users are not willing or can’t afford to purchase a new set of pouches to create an effective system around a new product.

Another option is to use a hook and loop adapter, which is where the Vanquest MOHL system comes in. The MOHL (MOLLE onto Hook and Loop) system is a lightweight set of panels that allows the end user to attach MOLLE pouches and other items to a hook and loop surface for a fraction of the cost of purchasing new pouches. (Continued below photos)

Two Options to Tackle Anything the Wild Can Throw at You

Vanquest offers two items in the MOHL system. The first is the MOHL-Air, which allows the user to attach a MOLLE pouch to hook and loop surfaces. The panel comes with six tabs that wrap around the MOLLE webbing on the back of the pouch and secure it to the panel. The user can then attach the pouch to a hook and loop.

Users can also weave pouches with MOLLE straps through the panel. The MOHL-Air panel worked well in securing the FAT-Pack 7×10 pack to the back of the Falconer-27 pack. The hook and loop on the MOHL-Air is quite tacky and the pouch easily stayed put on the pack.

The second panel in the system is the MOHL-Web. This is a panel with a web of shock cord woven through. This panel is particularly useful for keeping bulky items such as water bottles or hard cases from moving around inside a pack.

The panel we received was part of a first-run batch and only allowed attachment of a four-inch diameter water bottle. Vanquest reported that the panels on the market now have six inches more of shock cord and can accommodate larger items.

The MOHL system of panels offers a big advantage in modern pack organization. They’re quite useful for a variety of loadouts and offer a significant cost benefit over purchasing a new set of pouches to accommodate new bags with hook and loop panels inside. For the cost of a new hook and loop pouch, a user could purchase two or three MOHL panels and customize a bag or pack to fit their needs.

This is a well-built 27-liter backpack that offers the user near limitless options for organization with a plethora of webbing, cord, and hook and loop options. It thrives in a variety of environments and is well suited for day hikes and daily commutes. Need to get out of town quick? Travel and bailing out are easy with this pack suited for performance under pressure.

Construction

The Falconer-27 is constructed with 1000 denier Cordura fabric with 210 denier nylon lining the pockets. The Cordura body is also Teflon coated which will resist intrusion from splashes and short drizzles. The fabric is durable and holds up well to abrasion from rough surfaces. The straps and grab handle are box stitched and hold up well to being handled and mishandled on trail.

In one test, I found that the fabric resisted tearing from a short drag on rough asphalt while loaded. On another run of that test I saw that the zipper and compression strap had been torn. I looked back at the surface of the asphalt and found that several sharp, jagged protrusions had hit the pack against where I was storing a pelican case and steel camp stove against the pack. That’s more my fault and I don’t hold that against the pack’s construction as that kind of weight and edge would probably tear any fabric. I believe this pack will stand up well to long outdoor use and abuse, provided you don’t force it on a cutting surface.

Comfort

Despite only having a thin plastic sheet between the mesh back panel and hydration compartment, the Falconer is quite comfortable with loads in the 20 pound range. The shoulder straps are ergonomic and carry the load well, especially with the load lifters on top. I did have to play around with the sternum strap a bit before finding a setting that brought the straps away from my shoulder socket and more towards my chest. The two-inch webbing hip belt is not padded, but it helps engage the lumbar pad on the pack.

Organization

If you lose something in the Falconer-27, you’re probably doing it wrong. The front admin pocket opens up to reveal two shock cord ladders, two stacked rows of webbing, a secondary pocket secured by hook and loop and four small slots. This pocket can organize anything from first aid supplies to survival gear to electronics equipment. I was able to load a flashlight, notebook, pencil, different firestarters, water purification, chem lights and other things here.

The top pocket has a divider with four webbing slots. This allows organization of smaller items and is also large enough to store a pair of ski goggles. There are four rows of MOLLE webbing on each side with two columns each to attach more pouches or in my case a survival knife. The secondary compartment has three pockets and a small panel of loop Velcro for attaching pouches.

The main compartment has a full panel of loop Velcro on each side as well as loop panels on both sidewalls. There are also a Velcro secured pocket on the side opposing the backpanel. On the edge of the back panel is a row of molle going from top to bottom. The hydration compartment is also lined with loop Velcro. I found the compartment to be too tight for a 100 oz. Camelbak Omega Water beast reservoir. The lower profile 100 oz reservoirs on the market may work out better but I recommend using something in the 70 oz. range to keep the back panel from ballooning on you with a full main compartment.

Ideal Uses

This pack can thrive in a variety of environments. The appearance isn’t totally tactical and it doesn’t have MOLLE webbing all over it. The pack can bike to work with you and carry your electronic essentials in the organizer pockets. A 15-inch laptop can be secured in the main compartment and the hydration compartment will easily fit smaller laptops and most tablets. It’s large enough to carry a spare clothing and travel essentials but compact enough to fit in an airliner’s overhead compartment. The size and durability also make it ideal to hold survival essentials inside for the time when you’re driving and forced to leave your vehicle in order to make it home.

Find out More about Vanquest Gear

You can find more by visiting the Vanquest Tough Built Gear website at www.vanquest.com or get right to the backpack right here.

Don’t trust your first-aid and rescue supplies to anything less than the best. We test out the latest from the gear professionals at Vanquest, the sturdy and versatile FATPack 7×10.

Rick is a member of Eugene Mountain Rescue, a specialized team in the Lane County Sheriff’s Office Search and Rescue Program. He frequently uses outdoor gear in Search and Rescue (SAR) operations. We asked him to put some gear to work and test it’s performance. 

I carry a considerable amount of first aid equipment when on SAR missions. My kit will contain essentials for treating common back country injuries such as sprains, fractures and bleeding along with dozens of band aids and other small items for treating the small wears and tears that happen in the outdoors. On top of that, I will also carry patient packaging materials and survival equipment such as space blankets, hand warmers and small packs of emergency water.

As I expanded my supplies to fit my mission, my pouch started stretching and becoming more inconvenient to use. At the time I was using a Red Cross pouch that had so far proven to be a trusty companion. However, pulling it out of my pack in rainy or wet conditions started feeling more and more like trying to palm a basketball.

I saw the need for a new pouch and started looking around online. I was interested in a MOLLE system because I could attach it to the outside of my pack for security while using or to my climbing harness when moving in confined areas. Almost all the MOLLE Pouches I found were either small and designed to fit the essentials for treating a gunshot wound or other trauma or too large and lacking the organization that I needed.

Enter the FATPack 7×10.


Organized Essentials for Quick Access

I was curious about Vanquest’s latest first aid pouch offering because of its size and unique manner of organizing kit. The pouch has four pockets, elastic bands, a shock cord ladder and small zippered pouch for holding first aid essentials. The design of the pouch is essentially an expanded version of Vanquest’s FATPack pouches. Those and similar pouches had caught my eye earlier but appeared to be too small for my needs.

I was able to fit larger dressings and patent packaging material in the larger internal pockets and a small poncho inside a hidden external pouch in the front of the pouch. Smaller items such as alcohol wipes and band aids fit into the shock cord ladder. The small zippered pouch fits a set of gloves along with aspirin and small packets of antibiotics and hand sanitizer.

Another striking feature of the pouch is how it’s opened. When attached to a MOLLE surface, all you have to do is pull the top handle and it will open up to display all of your equipment. If you’re using the pouch as a stand-alone item, I recommend putting a non-locking carabiner on the tab on top of the back of the pouch to make a secure spot to grab the pouch and open it with two hands.

Durability to Endure Tough Climates and High-Pressure Rescue Operations

To top it off, the pouch is made of 1,000 denier Cordura fabric with a 210 denier orange rip-stop nylon interior. The Cordura is treated for water resistance, although I personally prefer to keep my first aid items inside at the top of my pack away from the elements.

This pouch is a game changer for me. My gear is more accessible and secure at the same time. It’s a far easier item to grab out of my pack even when wearing wet gloves.

Even though it’s a solid pouch, there are still some modifications to be made on my end. I’ll be adding the aforementioned carabiner at the top for easier two handed use when not carried on a MOLLE pack. While the pouch comes with two hook and loop tabs for securing shears, I find that these are difficult to use while wearing gloves and could cause issues in colder environments. I recommend buying a separate dedicated pouch for shears. This pouch can be attached to the FATPack via webbing on both sides on the pouch. An optimal setup would be shears on one side and a tourniquet on the other if those are necessary parts of your kit. I would also love to see the pouch in red or orange for first responders.

Overall, I’m impressed with this product. Expect a follow-up review sometime down the line after this pouch has logged some mission time.

You can find out more about Vanquest Tough Built Gear at their website here. Want to see more modular pouches and pockets from Vanquest? Click here.

A wilderness survival first-aid kit is very different from the kit you keep at home.  Add these five items so that you’re better prepared for wilderness emergencies. The items aren’t expensive and don’t take up much space, so there is no excuse for not having them with you. Being trained and prepared for wilderness injuries is crucial to survival. Continue reading “Build a Wilderness Survival First Aid Kit” »

In honor of the snowfall and chilly temperatures, we ranked our top 5 pieces of essential winter gear. We’re in the the holiday spirit, and we want you to stay warm and dry out there. Before you head out into the winter wilderness make sure you have all of the necessary gear.  Surviving the winter temperatures requires a whole different set of equipment. Anyone from backpackers to preppers to weekend warriors should love this stuff!

Item #5  Backpack with an Avalanche Airbag
Unsteady snow and unpredictable weather can cause avalanches. When buried under the snow, every second counts. If you’re spending a lot of time skiing in the snowy mountains, try out a backpack equipped with an avalanche air bag. These backpacks are perfectly functional, but they also inflate to protect the neck and head during an avalanche. The extra room that a deployed air bag can provide in an avalanche can help you survive. These bags can be repacked and refilled after it’s used.

Item #4 Backpacker’s Coffee and Tea Maker
You’ll need it in the backcountry too, not just the office. Anyone in cold temperatures for long periods of time needs warm liquids and a little pick-me-up. A backpacker’s coffee maker is the perfect piece of gear. They are lightweight, compact, and can be re-used over and over again. You can find coffeemakers in drip or press models. A French press style maker is totally portable and delivers are nice strong brew. A drip style maker can hold the coffee grounds perched above your cup and is great at keeping grounds from the hot joe. Many models work just as well for loose-leaf or bagged tea.

Item #3 Battery Powered Heated Gloves
Gloves that are waterproof and heated are going to go a long way for survival. They are also great for winter sports like ice climbing and snowshoeing. You’re going to need them when the temps drop. Different settings are available, so on a low setting these gloves could last up to 8 hours. When you’re purchasing heated gloves make sure they heat the whole hand, not just the fingers. Rechargeable batteries are available and some models offer the option of charging with a USB hook-up.

Item #2 Four Season Tent
Shelter can’t be overlooked when it comes to survival in the winter weather. A four season tent is just that, shelter that has you covered in all four seasons. These tents often have reinforced walls and extra strudy zippers to keep out anything that Old Man Winter can dish out. A four season tent can fit up to four people or more, including their gear. There are a variety of styles available, but all are created to withstand lots of wet and wind and snow. Look for models that will be easy to set up in whipping winds or while wearing gloves.

And the top ranked winter survival gear is…

Item #1  Backcountry Snowshoes
For the money, snowshoes are a practical and safe winter survival item. Anyone can use them and they don’t require any death defying trips down steep mountains. When it comes to winter survival, snowshoes are essential. Anyone can travel multiple miles each day with a good pair of snowshoes no matter what the weather throws at them. There is a huge variety of styles and price levels. For surviving those long trail backcountry trips, look for sturdier types of snowshoes that can support your weight plus a pack.

These pieces of winter survival gear will really be nice to have when the winter winds bring snow and ice. Stay dry, stay warm, and most importantly, have fun out there.

Throwing knives are often overlooked as a tool for survival. Just like any other weapon, it takes time and practice to perfect. Using throwing knives successfully requires concentration and excellent technique. There are a few blade types to test out and a few throwing styles that can fit various levels of skills. If you’re looking to buy a set of knives, there are several types to consider. For the price, a good set of throwing knives can end up being an indispensable asset to have.

Reasons to Carry Throwing Knives
Few weapons can boast as much history as throwing knives. Our ancestors relied on thrown blades for personal protection as well as hunting. They are simple, quiet, and never need to be reloaded. When planning for survival situations, weapons that are reliable and quiet are great options. If the situation continues to get worse, throwing knives will only need to be sharpened and you’ll never need to buy ammunition.

Throwing knives are also very light and small. If you’ll need to travel a good distance on foot, this will be essential. For the most part, you’ll find knives no more than around 12-13 inches in length and 13 ounces or so. Survival situations will require you to move quickly and maybe over long distances. In these cases, weight is incredibly important. You don’t want to rely on something that requires constant maintenance or many parts that you might have to replace. Throwing knives can be essential items to keep on hand.

Knives are quiet and do not draw any attention to themselves. If there are multiple threats or prey, you’ll be able to handle each one without alerting the others. They are the best weapon for stealth. Believe it or not, throwing knives aren’t just for ninjas and martial arts types. Small game and personal threats can be stopped in their tracks with an accurately handled knife.

Look for These Features When You’re Buying Throwing Knives
You can throw any knife and hope that it hits the target, but throwing knives are usually built just for one purpose. Would you try to strike out a batter with a basketball? If you want to achieve excellent results, you need to use well-designed throwing knives. There are tactical throwing knives that can be used for general purposes as well as throwing.

These types of knives are streamlined in design and very light to carry. Basically, you’ll find throwing knives built blade-heavy, handle-heavy, or balanced. The heaviest part of a knife should be thrown first, so if the knife is blade-heavy it will be held in your hand. This technique is best for beginners. A balanced throwing knife is thrown either blade or handle first, so it is more versatile depending on what your needs will be.

Handles of throwing knives can vary in style. Some cord wrapped options provide a good solid grip. Handles of the slim knives are often bare to streamline the throw and maintain a good balance as the knife makes its rotation through the air.

How to Practice with your New Throwing Knives
The best method for starting your knife throwing practice is the Hammer Throw. Grip the handle of the knife as you would a hammer, but with your thumb kept along the edge instead of wrapped around the handle. Bring your hand up to about ear level with your elbow level to your knife grip. Be sure to throw the knife straight ahead and keep your follow-through a clean line and not across your body.

Set up a sturdy target that can handle plenty of knife strikes. Make sure that it’s out of the way since your throws might take some time to perfect. Start by standing  8-10 feet away and throw at a 4 inch bullseye. To perfect your technique, vary your distances and pay attention to the number of rotations it takes the blade to make contact.

Throwing knives are the perfect addition to any survivalist’s arsenal. It takes time a practice to master the technique, but the benefits are many. They don’t take up much room and are light to carry. Knife care and maintenance doesn’t require much time or money. Keep a set of throwing knives available and practice your grip and throw. You never know when they just might save your life.

The winter season brings challenges for travel as well as weather that can wreak havoc. There are survival strategies that are unique to the ice, snow, and freezing temperatures. Ice storms can cause power outages that can last for days, traveling on roadways is a hazardous gamble, and unpredictable weather patterns require quick responses.

With all of the chaos that winter can bring, you can’t be over-prepared for emergency survival. Holidays mean that many people do lots of traveling in their cars and trucks. The nasty weather also means that many people choose to drive to places in their communities where they would normally walk or bike in more pleasant weather. Your car is the first place to equip when it comes to preparing for winter survival.

Items You Can’t Live Without
First things first, you’ll need to have a shovel in your car. Removing snow and ice from under wheels can be a crucial first step in removing your car from a precarious situation. Models of foldable shovels are out there to save space in your car, so there’s no excuse. After you’ve done your best to dig out of the snow, you’ll need a few blankets or sleeping bags on hand to stay warm. Running your vehicle too much not only uses up valuable gas, but can be hazardous if your exhaust is trapped in the snow as well. Be sure you can stay warm and still only run your car’s heat for maybe ten minutes per hour.

Staying warm requires body energy and heat, and that doesn’t happen without water and food. Good snacks to consider are items that aren’t perishable and will stay in your car for the winter without spoiling. Candy bars and protein energy bars are compact sources of quick energy that will be useful. Having clean water on hand is an undeniable need for winter survival.

Stay Alive with These Strategies
As you drive, keep your approximate location in mind. Note road signs you pass and know what direction you’re headed. If a call to 911 or to family needs to be made, it will help a lot to be able to give them your location. Don’t drive blind, know where you are at all times or at least how you there.

Along the same lines, if you’re headed out on the road in the winter be sure to let someone know where you’re going and about what route you’ll be taking. If someone hasn’t heard from you in a while or has been expecting you and you haven’t shown up, they’ll know when you left and may be able to find you on your route.

When you’re stranded in the car and waiting for help to arrive, keep in mind your warmth and safety. Avoid exerting yourself too much if you’re trying to dig your car out or walking for help. Winter weather is unpredictable and you don’t want to get caught too far from your vehicle. Take frequent breaks if you are trying to dig out or repair your car to prevent too much sweat or dehydration.

Keep these strategies in mind when you travel this winter and increase your odds of arriving at those holiday parties safe and warm. Preparing doesn’t require too much effort and can have big payoffs in case of a winter emergency.

A survival knife should be on hand when a situation calls for a survival tool that is versatile, reliable, and deadly. Their simple design and quiet effectiveness make them an indispensible item in any emergency situation. They don’t require ammunition, they can serve a variety of purposes, and they are a self-defense weapon perfect for close combat needs.

Check Out These Extra Features
Survival knives are probably best known for having a variety of features that allow them to be used for quite a few different purposes. Check out the handle of this type of knife for some unique features.

  • You can spot a survival knife by its hollow handle. These types of handles are used to hold a small survival kit made up of any combination of fire strikers, fishing line, hook, a needle and thread, or matches and striking paper. Any of these can be a critical element in a survival situation. Give each of the contents a through trial run and practice using them so that you are familiar with them when the need arises.
  • On some models of survival knife, you will find the handle wrapped in cord that can be useful in several types of emergency scenarios: tying down belongings, stringing up food bags, combat situations, and wilderness first-aid just to name a few.
  • At the end of most survival knife models you will also find a compass built in. The benefits of having a compass accessible are obvious, given that the knife carrier is knowledgeable on how to best use it. Take your compass out for orienteering practice runs to get familiar with it. Keep in mind your direction and location in relation to important landmarks so that you can use the compass if lost or disoriented.

The Heart of a Survival Knife is the Blade
The larger sized survival knife brings a heft and length that makes it more reliable for tasks that a smaller pocketknife couldn’t handle.

  • The survival knife you should be carrying on you should be equipped with a sawback blade. It makes your knife capable of making larger branches into purposeful firewood or materials for constructing a shelter.
  • The knife’s usefulness in food preparation and preparing animal kills pretty much goes without saying. Just be sure to keep in mind that, just as with any crucial tool, a survival knife requires near constant cleaning.
  • Be sure your survival knife is full tang. This means that the blade extends down into the handle in one single, solid piece. A full tang survival knife will be stronger, more durable, and endlessly reliable.
  • When used for self-defense, a survival knife can really prove its worth. You’ll spot a quality survival knife when it has a sharp pointed tip. When considering blade design, this is an essential element for survival. A sharp pointed tip increases the knife’s ability to defend in a combat situation or for hunting.

You should be carrying a survival knife because it is an essential tool in situations that require you to complete a variety of tasks. You may not be able to carry much with you or may need to move quietly and a knife serves excellently. Crack open the handle for more supplies that can keep you fed, warm and dry, and headed in the right direction. The survival knife is a dependable and versatile emergency tool.