No matter how much gear you have in your pack or bug-out bag, if you don’t know how to use them or have some basic survival skills, you’re not going to last very long. These are the top 5 skills you must have if you’re going to survive TEOTWAWKI or a SHTF social breakdown situation of any kind.

1. Find and Purify Water

There are a number of ways to do this. We’ve written about “collecting water in the desert” as well as “building a better rainwater harvest system, ” so click around on this site for ideas. You must have some sort of purifier like a Lifestraw, or know how to collect water through condensation. Even in the desert there is some amount of water in the air. I’m lucky enough to live in a place with an abundance of water, so to be honest I’ve never actually tried any of the water-collecting methods I talked about in that first article, but I’m inspired to try them now. Look for an upcoming column about how some of these methods actually work.

2. Start a Fire

Another topic we’ve written about before…Click around for articles like “testing petroleum soaked cotton balls for firestarters” and “firestarter options and backups.” I personally have a small biofuel stove at home, which efficiently burns sticks, twigs, pinecones and stuff. I have a 2-quart plastic container in my utility room full of stuff that I picked up off the ground in mid-summer . . .  twigs, moss, fir cones, pine needles and other things that are bone dry and will readily burn. I have a packet of char cloth (both purchased and home-made), I have a fire piston (which utilizes only char cloth to make a spark), a magnesium scraper, matches, lighters, and a magnifying glass. Someday I’ll learn how to make a fire with sticks. Seriously, making a fire and having dry tinder is crucial. Have many options for fire starting available to you.

3. Build a Shelter

Depending on the geographical area where you are, the materials and techniques you use to create a shelter will be wildly different. In my part of the country, I would use the teepee approach by cutting down saplings and lashing them together. Then I’d take any tarps I had and use that as a covering and enhance that with branches. It would be tough to make it sturdy when one of our windstorms kicked in, which is why it’s so important to have some tools and rope available. I found this video that I thought had a good example that anyone could do provided they had a tarp:

4. Find Food

I’ve invested in a few books about identifying and using wold foods and you should too. I’m familiar with what grows around me and I keep an eye out for what foods are in my area. I know where the nearest stand of cattails is from my house and I no longer pull the cleavers out of my yard now that I know they are edible. Take a course on “how to eat acorns” like I did, and get either books specific to the wild food that is available in your area or learn from a skilled forager.
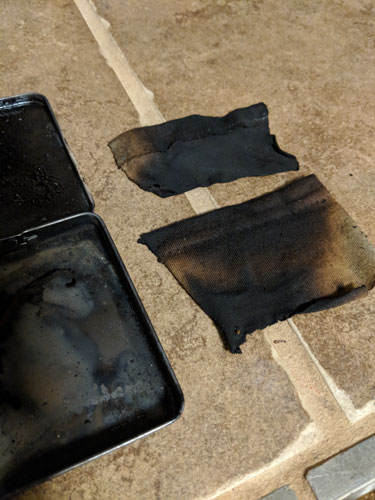
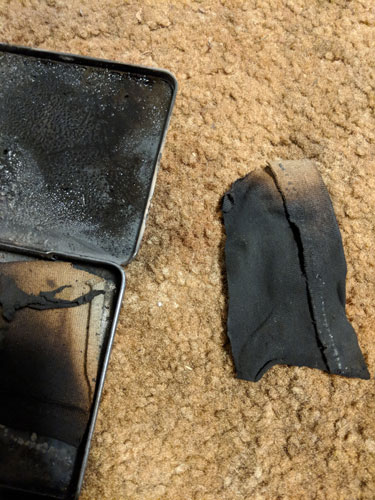
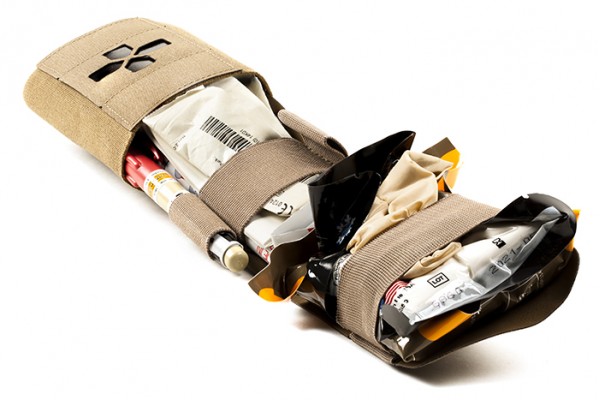
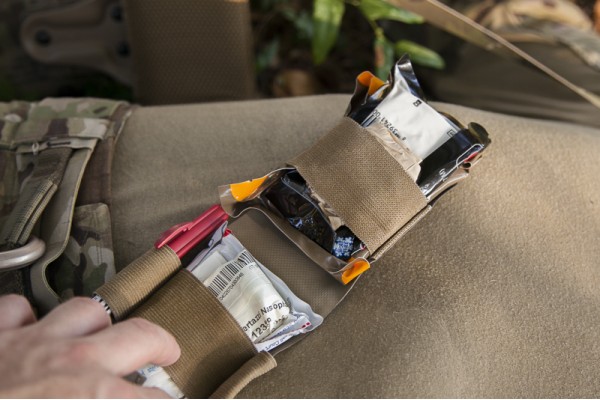
5. Basic First Aid

Everything I mentioned before will keep you alive, but it won’t help you if you get an infection (because there’s no soap or hand sanitizer) or you gash your leg and bleed out. We’ve reviewed the book “Bushcraft First Aid” and that’s a good start. Have some basic supplies in your kit and know what to do in a variety of situations. Just taking a basic first aid course through the local Red Cross would be a good start.

Forbes had an interesting article that I thought was worth sharing to our audience here.

Take a look at this map of what the future USA might look like:

Source: Matrix Institute from a map by Gordon-Michael Scallion

I’ve long known that billionaires like Ted Turner had very large parcels of land in the central United States. But I always thought that was just because they liked the privacy and the ranching life, with cows and stuff. But maybe there’s more to it than that?

What does this map of the US make you think of? This is what some experts are saying the United States might look like if a pole shift caused massive flooding along the existing coastlines. That Forbes article kind of goes into it all…in the early 1980s there was a “spiritualist” named Gordon-Michael Scallion who reportedly believed that he had been given visions of a very detailed future map of the US. He believed that a shift in Earth’s magnetic poles would result from nuclear weapons, global warming and misuse of technology and that it would unleash catastrophic flooding.

Another spiritualist named Edgar Cayce predicted that volcanic activity would result in massive flooding on the west coast. While NASA denies that there is significant risk to the Earth from collisions with asteroids, they do have an asteroid watch website. The Forbes article references a planetary science researcher who says that the most likely scenario to cause a future like the one predicted by Scallion is an asteroid impact.

Maybe, the billionaire’s plans to buy up property in America’s heartland isn’t just because they like cows.

Some fire starter systems rely on char cloth. I wrote about the fire piston that I bought a while ago as one of some backup fire starter systems to have on hand. I like the fire piston, but it requires some type of tiny piece of tinder and char cloth is recommended. You can buy char cloth online for relatively inexpensively. But I’m here to show you how easy it is to make your own. I bought some online for about $7 and then paid $5 or so for shipping, so with these instructions here you can save that money and make a lot more char cloth than what you could buy for that amount of money.

Even if you don’t have a fire starter system that relies on char cloth, it’s still nice to have char cloth on hand. It catches fire easily and a large enough piece can stay lit long enough to get your other tinder alight.

Char cloth is made through a process called pyrolysis. this means that the material has been heated without the presence of oxygen, so it stopped short of burning up through combustion (which requires oxygen to occur). Because the material has been partially burned already, it catches fire readily and smolders with a low flame that makes it ideal for fire starting.

First things first … gather your materials. You need:

  • 100% cotton fabric. I went to the thrift store and looked in the men’s section until I found a 2 XL 100% cotton t-shirt and bought that for a couple of bucks. 100% cotton denim jeans can also work, but because the fabric is thicker it will take longer in the fire and you’re slightly more at risk that your material will combust rather than burn through pyrolysis.
  • a sealable tin like an Altoids tin or metal bandaid can. I had a small cigar tin that I’ve been holding on to for the purpose of making char cloth.
  • scissors
  • You need a fire that’s already going.
  • tongs or something to get your hot tin out of the fire.
  • That’s it.

The size of the piece you can make is dictated by the size of your tin. A larger tin holds a larger piece of fabric. Cut your fabric to the size and shape of your tin.

Making your own char cloth
The unburned tin and the unburned 100% cotton fabric.

Most of the instructions will tell you to poke a tiny hole in your tin. This tiny hole allows the gases to escape without allowing oxygen or flame to get into your tin and burn up your material through old-fashioned combustion.

I made my first piece of char cloth in a tin with no hole at all, and it worked very well and in only 30 seconds or so. The other pieces I made after poking a tiny hole in my tin and I found that the pieces took longer to burn up completely. Try it first without a hole and see how that works.

The point of the hole is that you’re supposed to be able to remove the tin from the fire when there’s no smoke coming out of the hole. But if there’s other smoke in your fire (as there usually is) and it’s a very tiny hole, it’s pretty hard to tell if there’s smoke coming out or not. Some people make their char cloth on a smaller flame like a candle or a sterno flame and if you do that, you could see the smoke coming out.

If you have no hole, check your char cloth after 30 seconds. If you have a small tin, this may be long enough. Let the tin cool before opening, or else use tongs or something that allows you to open it without burning yourself.

I found that my tin wanted to pop open when it started to get hot, so I needed to make sure the tin lid was pushed on well. After the tin is cooled, open it, and you should see that your 100% cotton fabric has turned black, shrunk a little, and becomes fragile but not ashy.

Here’s my son seeing how a piece of our char cloth burned.

Making your own char cloth
The char cloth slowly smolders rather than burns quickly.

Did you know the CDC has stockpiled caches of nerve agent antidotes around the country? The CDC (Centers of Disease Control) states that if their nerve agent antidote is all in one place (like Washington, DC, for instance), that it would be too difficult to deploy the antidote in the event that there’s a need for a fast response.

The CHEMPACK antidotes treat the symptoms of nerve agent exposure. It works even if you do not know exactly what nerve agent is causing symptoms.

The antidotes must be administered quickly. The CDC keeps 1,960 containers that are available at the local level, strategically placed in more than 1,340 US cities. The government doesn’t make the exact locations for the Chempacks known. There’s little info available online that I can see that tells where they are.  Take a look at page 10 of this PDF I found and see what region you’re in: https://www.deadiversion.usdoj.gov/mtgs/drug_chemical/2008/jstear.pdf

If you want to know more about your particular state or county, start by looking at the state health department website. I had to do some digging, but I found a newsletter online that states, “Oregon is home to several CHEMPACK containers, which are strategically placed throughout the state.” That’s as much info on the location of the Chempacks that I could find. But, the CDC estimates more than 90% of the U.S. population is within one hour of a Chempack location. Do a little digging and see what you can find for your state. Call your local hospital or fire station and see if they will tell you if they have one or not.

On April 11, 2017, the FDA issued an Emergency Use Authorization (EUA) to permit the emergency use of the 2 mg atropine auto-injector, manufactured by Rafa Laboratories, Ltd. On May 23, 2017, FDA amended the EUA to also permit the emergency use of pediatric strengths (i.e., 0.5 mg and 1 mg) of this atropine auto-injector. These products are included in Chempack containers located across the United States. This specific atropine auto-injector is authorized for the initial treatment of symptoms of known or suspected poisoning in individuals exposed to nerve agents or certain insecticides (organophosphorus and/or carbamate).

Pretty much all the online resources of Chempacks all link back to this one page: https://www.cdc.gov/phpr/stockpile/chempack.htm

Photo from blogs.cdc.com. First responders prepare for Chempack training.

We’ve all seen a change in how our government is handling North Korea now that Donald Trump is president. Previous administrations quietly acknowledged that Kim Jong Un was a madman while publicly either ignoring him or politely tiptoeing around any threats he made.

Our current president has done quite the opposite. In President Trump’s recent speech to the United Nations, Trump called Kim Jon Un a “rocketman on a suicide mission.” News analysts have stated that President Trump is wading into dangerous territory. This is because the North Korean culture and particularly the god-like status that is given to its leaders does not allow a path for the leader to back down or retreat. If an attack by North Korea does happen, it is likely to be in the form of using electromagnetic pulses (EMP) as a strategic weapon.

They could employ a high-energy hydrogen bomb which would be detonated from a high altitude over the United States mainland. The result of all that power being released would be burning out the high-voltage transformers that link the US’s electrical grid. According to this article on the Huffington Post, there’s no replacements readily available for the transformers that would be destroyed in an act like this. Only one plant in the US makes them, but this plant makes smaller versions. The largest ones are made in Europe or China and there’s a multi-year backlog for them.

If you live on the Eastern seaboard, you are particularly vulnerable to an EMP attack because the country’s power grid on that side of the mainland is older and highly interconnected.  Just reading about what the experts predict could happen in a case of EMP attack is scary — major sections of the United States without electricity for potentially years, catastrophic death and suffering, no industry, no crops. The actual detonation would be far enough up in the atmosphere that it would not kill people directly, but the lack of infrastructure that would result would kill hundreds of thousands or millions, easily. “Riding out” an attack like this would be extremely difficult.

Protecting small electronic devices can be accomplished fairly easily by storing them in EMP bags, aka anti-static bags. If you purchase EMP bags, research them to make sure you’re getting high-quality bags. The shielding that these bags offers can vary widely, from  10 dB (a factor of 3 reduction in electric field strength) to >50 dB (a reduction of 316 in electric field strength). Choose the highest level of shielding, which is approximately 50 dB of shielding across the EMP frequencies, which range from 100 kHz to 1GHz.

Perhaps that should be the basis of another post! Most people don’t understand how frequencies work and what the actual danger is. For those that don’t, suffice it to say at this point that anything that plugs in (your electric drill, your toaster) or utilizes electricity (your car ignition, your generator) could be screwed to the point of non-function.

If the company is saying that you need to use or buy multiple bags or multiple layers, that means that their product is offering a minimal level of shielding. You can buy multiple high-quality bags for under $100, so that makes this a relatively easy item to add to your SHTF preparations.

For large items like generators or solar panels, these bags won’t work. For that there are fabrics that are called EMP cloths that can be draped over large items. People have made homemade Faraday cages out of metal containers like galvanized garbage cans. That’s beyond the scope of this article, but there are a lot of instructions out there for this type of structure.

Overall, the likelihood of this type of attack may seem far-fetched. But it’s safe to say that we’re closer to an event of this nature than ever before. While some things may work after an event like an EMP attack, it’s also a safe bet to assume that nothing will. Plan accordingly.

Why should everyday carry gear be boring? If every day you’re like, ‘Oh gees, this heavy, plain, boring thing again that I have to hook to my belt,’ you’re eventually going to stop caring whether you have it on you or not. We predict that will never happen with this coin claw.

Designed by Serge Knives – we have to say we’ve never seen another knife in this style that is this high quality. To me, this claw coin is the perfect pocket size. No one would ever even know you have it. It’s just slightly larger than a quarter…sort of in between quarter size and half-dollar coin size. The curved blades follow the arc of the circle as they open.

When they’re closed, the coin is 1 5/8 of an inch in diameter and it’s 2 5/8-inch when open. The 1-inch blade stays securely closed when it isn’t in use thanks to a slipjoint-like built-in spring. This is good because you wouldn’t want this baby opening up unexpectedly when it’s in your pocket! They come in different colors on the blade holster part of the coin.

At least the first generation of the claw coins were made with your choice of CTS-XHP, 154-CM, or CPMS30V steel for the blade. The housing is built from 6AL4V titanium using stainless screws. When we first heard of these knives Serge Knives had some available. They’re no longer available now but the website is offering a sign-up for alerts about more being made. That’s one mailing list we want to be on.


Images courtesy of SergeKnives.com

Now that the sun is reliably shining, harness that energy for your devices and emergency gear. Here’s a list of the top 5 solar chargers that you can have on you at all times. We also wrote this helpful guide to choosing a power bank to explain what qualities to look for in a charger. There are a lot of variations on power sources. You can use the equation I=P/V to help you figure out the  power requirements based on what you know. V is voltage, P (power) is measured in watts, and I is amperage. For instance…a 100 watt light bulb requires just under 17 amps. if you plug in 100 for I and 6 for V. Most chargers are in the realm of 3 to 5 volts. You pay more for more power output. Make sure you understand the specs of what you are buying and how it relates to the actual device and the battery capacity of the devices you have.

1. Voltaic Systems Amp Solar Charger

This clever design has the charging panels fold over each other and zip into a case. The case is made from recycled soda bottle plastic and is lightweight and waterproof. (Honestly, I’d say water resistant and not proof. I wouldn’t submerge the case or get it near any significant amount of water.) Point the solar panel towards the sun and charge the battery, or charge the battery from any USB port. Once the battery is charged, hook your phone up to it. It also comes with an adapter to charge a camera. The voltage is adjustable to either 4.4 watts at 6 or 12 volts. It charges all USB devices including Apples and Android phones and tablets (it will not charge the 12 or 16 volt tablets like the Lenovo brand).

  • 6.5″ high x 5.5″ wide x 1.5″ deep (16.5 cm high x 14.5 cm wide x 4 cm deep)
  • 1.1 lbs (480 g) including battery and solar panels

Comes in silver or orange colors at an affordable price of $99. buy from Voltaic Systems.

2. Goal Zero Guide 10 Plus Solar Kit

When I first saw a coworker with this about 5 years ago I went out and bought one. We were away from home at a conference and were in a sunny spot. He plugged it in and kept his phone full all day. My own phone charged at the time fully in about 2 hours and there was still power left to partially charge another phone. When charging your device from the Goal Zero, it charges in the same amount of time it takes to charge your device from a wall. It takes about about 3 hours to fully charge the battery pack from the sun and about 6 hours to charge using the USB port. Since I bought mine, the newer versions are less expensive (only $40) and they come with 4 rechargeable AA batteries.

  • .8 pounds (solar panel)
  • Dimensions (unfolded): 9 x 1.5 x 17 in (22.9 x 3.8 x 43.2 cm)
  • Dimensions (folded): 9 x 1.5 x 6.5 in (22.9 x 3.8 x 16.5 cm)

Buy from Goal Zero.

3. PowerTraveller PowerMonkey Extreme Tactical

This is an upgraded version of the PowerMonkey Extreme the Australian company introduced a few years ago. I love the idea of the versatility of this item. It charges most 5V devices via USB and also has a 12V DC port for charging camera batteries and two-way radios. In an emergency situation, charging your communication radios could be key. The problem with it for me us the sheer number of pieces and adaptors that you have to keep track of. If you’re organized, it could work. Everything does fit neatly into a zip case though. The case color is “coyote brown.” The other issue for me with this is that it can take up to 22 hours in full light to fully charge. But when it does, it gives you 3 watts of power and said to be waterproof for 30 minutes.

Total weight: 1.00531 pounds (456 grams)

4. Goal Zero Sherpa 100 Solar Kit

This is more money than I can spend on solar, but if I could afford it, this is what I would get. This baby will charge a phone, a MacBook Pro and even a lightbulb. It has two USB ports so you can charge two devices at the same time. The 12V port will charge a light (Goal Zero makes LED lights specifically for this purpose). Recharge it from a wall, car or the sun with the solar panel that comes along with it. It fully charges from the sun in 10 hours or 3 hours from a wall. When it is full, it says you can get 2 full laptop charges from it.

  • 4.4 pounds (1.99 kg)
  • Dimensions: 5.8 x 1.5 x 5.25 in (14.7 x 3.8 x 13.3 cm)
  • Weight: 2.5 lbs (1.1 kg) (solar panel)
  • Dimensions (unfolded): 30.5 x 8.5 x 1 in (77.5 x 21.6 x 2.5 cm) (solar panel)
  • Dimensions (folded): 13 x 8.5 x 1 in (33 x 21,6 x 2.5 cm) (solar panel)

Buy from Goal Zero.

5. Bushnell Powersync SolarWrap 400

As awesome as the Goal Zero Sherpa 100 would be, sometimes you just want something a little more basic. This is only $50 and is pretty much the same size and the charging panels roll up. The solar panels are flexible and the whole thing is lightweight. Because you get a larger (longer) charging surface, it charges faster than other smaller models. It has one USB port, so you can only charge one item at a time. One drawback is that it needs to charge from a wall with a microUSB, which I don’t always have readily available. It takes 4 hours to charge it from the wall and 3.5 hours to charge from solar. It outputs 5V.

  • .10.1 ounces
  • Dimensions (rolled): 9.125 x 2.4 inches
  • Dimensions (unrolled): 29.25 inches

Find a retailer.

We’re pretty in love with CRKT stuff and we’ve reviewed a few of them here on this site (here and here, and we have a “first thoughts” video gear review of the new CRKT Rune Axe scheduled for Monday, June 26).  The CRKT Crossbones everyday carry folding knife has won Blade Show’s Imported Knife of the Year, and we think that’s pretty cool.

Designed by Jeff Park of Mililani, Hawaii, the knife won the award at the 2017 Blade Show, which took place June 2 – 4 in Atlanta, Georgia. This CRKT production model is modeled after his first custom release. The unique dog bone shape and sleek blade recall a paring knife or a fillet knife, but this one is truly thinner, lighter, and universal.

Ten years ago, Park got in touch with nearby Hawaii resident and knife industry star, Ken Onion. The rest is history. Park has been his right hand man ever since, and after much goading finally released a design of his own. This streamlined, 3.5-inch plain-edge blade is stamped out of AUS 8 steel, and features a satin finish. The clean lines, and contoured shape flow flawlessly into the handle’s design. Purchase the Crossbones from CRKT for $100.

Here are the specs:

CROSSBONES

SKU:                7530

Blade:               Length: 3.536” (89.8 mm)

Edge: Plain Steel: AUS 8

Finish: Satin

Thickness:        0.124” (3.1 mm)

Closed:             4.503” (114.3 mm)

Open:               8.0163” (204.8 mm)

Weight:             2.4 oz. (68.0 g)

Handle:             6061 Aluminum

Style:                Folding Knife w/Locking Liner

I’ve been thinking a lot lately about how I would handle a traumatic situation. I interviewed Tom Kaleta of Blue Force Gear last week about the company’s Micro Trauma Kit NOW! and why he thinks it’s so important to have these tools on hand to deal with the three most common battlefield injuries: airway injuries, lungs that won’t inflate, and massive bleeding. I’ve always carried a few Band-Aids and a basic first-aid kit in my car, but the need to be prepared for injuries goes well beyond that and I more fully understand that now.

While I’m pondering all this, the publication of Dave Canterbury’s new book, written with the help of Jason A. Hunt, “Bushcraft First Aid: A Field Guide to Wilderness Emergency Care,” is announced. I’ve reviewed Dave’s past two books for this site and I highly recommend them, with some reservations. They are focused on resources on the East Coast, and I’m on the West Coast, so some of the edible foods and tree species he mentions, for instance, are not common here. But beyond that, highly recommended. Read the reviews here:

“Bushcraft Field Guide to Trapping, Gathering & Cooking in the Wild”

“Advanced Bushcraft”

The new book is just what I needed to learn how to take the crucial first steps to being able to help my family or someone I come across who is in distress. Like Tom said in the interview, being able to be a “hero” by stopping someone with a gun who is shooting up a crowd is unlikely, but stumbling across a hiker with a broken leg or a car accident victim is much more likely, and I might actually be able to help them if I had any idea what to do, and the tools to do it with.

If you can, call for first-aid from medical professionals as soon as possible. But if you can’t, follow the procedures in the book using the items you will likely have in a well-planned wilderness bag or advanced first-aid kit. As usual, Dave covers the basics very well, such as remaining calm and being prepared in the first place with the right kind of gear (which he covers). He covers basic powers of observation that you’ll need if you come across an injury scene: see if you can figure out what happened based on situational clues, and making your assessment of the victim. He covers how to safely move a victim, and how to signal for help if you are in a remote area.

Moving into the treatment chapters, Dave covers how to stop bleeding, and how to close a wound using Gorilla Tape. If you don’t have a tourniquet, you can use a piece of rope or paracord and a stick. Gunshot wounds to various body parts and knife and axe wounds are all addressed. Blisters and burns (and trenchfoot) and broken bones are covered in two separate chapters. This isn’t a medical textbook, so Dave doesn’t cover how to set a broken bone. He assumes that you will be providing treatment and then evacuating the patient to get professional medical care as quickly as possible. But I definitely feel that I now have a better understanding of how to deal with broken bones, even a broken thigh bone, by making a traction splint from a walking stick.

Further chapters deal with bleeding and shock, including internal bleeding and heart attack. Chest injuries and breathing (and choking) are covered. He addresses seizures and stroke, and headaches (if you can find willow bark or mint, that can be used to help). Like I said, Dave does a great job of covering the basics. You might not think you need to learn how to do anything to treat a headache, but what about a skull fracture? Dave doesn’t recommend treating many abdominal injuries without professional help as things like open wounds where the intestines are falling out or hernias can be too severe. But Dave does give basic advice that helps you to figure out what to do, such as signs to look for that things are becoming so severe that you need expert help.

After reading this book, you’ll know how to help with allergies or anaphylactic shock. If the issue is too severe to be helped with a basic kit, as with insulin shock (related to diabetes) he will tell you to evacuate immediately. Some of you will want more detailed information about what you CAN do if you CAN’T evacuate, or if you’re dealing with a SHTF situation and there is no 911 to call. In those cases, or if you know you have someone near you with a life-threatening chronic illness such as diabetes, you will have to earn more on your own.

One of the things I really appreciated is that Dave includes medicinal plants along with eight pages of photos. The book ends with a rather lengthy section on plant medicine, which is something I highly recommend everyone learn more about. In particular, learn what plants are in your state, your town, and even in your own backyard. Once you start really observing plants, you will discover that many plants you pass by every day have edible and medicinal uses.

Dave covers things that you might think you already know about, like frostbite or altitude sickness and animal bites (ticks, snakes, spiders). His “real life scenarios” vignettes help you think through what you might do in a real life situation. And what’s great is that many of his observations help you understand a situation more deeply, even if it is something you think you are already familiar with. For instance, did you know that a cucumber smell in the wild means that a snake might be nearby? I didn’t know that before reading this book. Still, pretty much every scenario in the book ends with knowing when to evacuate, or just evacuating at the first possibility. This is not a book for end-of-the-world scenarios where there is no help and you are the medical professional. This is a what to do until you can get to help book.

While it would be helpful to read this book through from cover to cover, an ideal way to use this book would be to keep it in your boat, your hunting cabin, your home bookshelf, in the trunk of your car, and in your bug out bag (or at least photocopies or notes of important sections), so that wherever you are you’ll be able to reference this information.

I particularly find the section on creating my own first-aid kit to be valuable. It lists bandages and dressings, ointments and medications, and tools in a checklist format that can help you be prepared for many of the scenarios in this book. And following Dave’s 10 most important ‘C’s that you need to have will help a lot too:

  1. Cutting tool
  2. Combustion device (fire tools)
  3. Container
  4. Cordage
  5. Cover (blanket)
  6. Cotton material
  7. Candling device (light)
  8. Compass
  9. Cargo tape (duct tape)
  10. Combination tool (multi-tool like a Gerber)

Bushcraft First Aid: A Field Guide to Wilderness Emergency Care, by wilderness experts Dave Canterbury and Jason A. Hunt, publishes June 13, 2017 by Adams Media, a division of Simon & Schuster). I highly recommend this book as a go-to first-aid resource for anyone headed out into nature. Learn more about the book or pre-order it from Simon and Schuster for $17. The book is available in Trade paperback format ($17) or as an ebook for (12). It is 256 pages long.

Would you rather carry a trauma kit that you picked out yourself and made from drugstore purchases, or one that was developed by special request from Delta Force Special Operations? Yeah, that’s what we thought. Most people can put together a first-aid kit, but a trauma kit is a second-level skill.

“We got a special request to create a trauma kit that soldiers could have on them in the field that was small and low profile,” says Tom Kaleta, marketing director of Blue Force Gear. “Turns out the trauma kits they were carrying were larger and more obvious, so it singled the guys carrying them out as medics and they were being targeted for that reason on the battlefield. We wanted to do something to correct that problem.”

The Blue Force Gear team spent the next month sourcing the smallest size packaging for the contents needed inside the trauma kit. Everything is made in USA and is the highest quality available on the market. The kit itself is so small that when on the belt it can look like a cell phone or wallet– it does not look like a trauma kit — and it contains items to help with what experts in the field have determined are the top three most common serious injuries.

The Micro Trauma Kit NOW! is sold in several variations with or without medical supplies. The “filled” versions come in basic and advanced.

Here’s what the Basic Kit includes:
1) Hemostatic dressing for wound packing/clotting (1 included)
2) 4-inch Emergency Trauma Dressing (1 included)
3) 9-inch Medical Grade Easy Tape (6 included)
4) Tourni-Kwik Compression Tourniquet (1 included)
5) Heavy Duty Medical Gloves in tan (1 pair)

Here’s what the Advanced Kit includes:
1) QuickClot Combat Gauze
2) HyFin Vent Chest Seal (2 seals included)
3) Cleer Medical Trauma Bandage 4-inch Flat Pack
4) Decompression needle
5) Six 2-inch-x-9-inch Frog Tape
6) Size 28 Nasopharyngeal Airway
7) Heavy Duty Medical Gloves in tan (1 pair)

The three injuries this kit is designed to treat are tension pneumothorax, which is when air gets into the lungs and the lungs can no longer inflate. Massive hemorrhaging is the second. The kit’s 4-inch Israeli bandage combines sterile dressing with the application of pressure to a wound. Finally, injuries to the head, nose or throat which prevent breathing can be treated with the kit’s nasopharyngeal airway.

Kaleta says some people have complained that the BFG Micro Trauma Kit NOW! advanced version doesn’t have a tourniquet. That’s because of two reasons. “Most people have a tourniquet on them in other ways, in the rest of their gear,” he says. “My guy Travis Hall always has one around his waist as a belt. Also, we just couldn’t fit all of this gear into the pack and a tourniquet too.” So, always carry a tourniquet on you.

Kaleta urges everyone to learn how to use the contents of the Micro Trauma Kit NOW!. People probably don’t want to use an aspiration needle in someone’s chest if they’ve never learned how to do it but the goal of the Micro Trauma Kit NOW! is that everyone will be prepared to handle severe trauma if needed.

“You know, you may have your EDC knife and pistol on you at all times and that’s great, but the chances of you being able to stop a situation where someone is a real threat are pretty slim. But with everything that is going on in the world today the chances of you coming across an injured person and being able to help them survive is a greater possibility. Even if you don’t know how to use these items, there’s a good chance that someone around you will.”

Kaleta feels so strongly about having a trauma kit on him at all times now due to a hunting accident he witnessed a couple of years ago. A friend’s black powder rifle exploded, severely injuring his hand. “We didn’t have anything with us,” Kaleta says. “It took my friend 2 1/2 hours to get the help he really needed. We went from being worried that he might lose his hand to being worried that he might not make it at all. And that was a scary, helpless feeling to see your friend suffer and not have anything with you to help him.”

His friend ultimately was ok, but they weren’t on the battlefield, or even hunting in the wilderness. They were in a remote part of the guy’s own property, and they still experienced a potentially life-threatening situation. Kaleta also stresses that had his friend been alone and had a traditional trauma kit that only opened with a clasp, he might not have been able to undo it.

If you ever experience a trauma and you’re muddy and bloody, you want something that opens quickly and easily. “It’s fine to think about packing a kit and knowing how to open it and what’s in it and where everything is when you’re safe at home,” says Kaleta. “But when you’re traumatized adrenaline sets in and you don’t think clearly.”

This kit’s ball handles make it easy to deploy with one hand on either side. Furthermore, when it opens, it falls open with the contents easily arranged and visually laid out in front of you. The kit was constructed with care, so that everything has its place and you don’t have to search for things. The kit opens, falls open, and reveals its contents in an organized manner.

Another advantage to this kit’s construction is the super strong Ten-Speed military grade elastic. “This is the high-quality elastic we always use in construction of our gear,” Kaleta says. “This elastic is like wearing a scuba suit or lycra and tucking something inside that. It holds it that close to your body. If you’ve got guys on planes or in the field, you can’t have your kit getting caught on anything and with this elastic it stays in place.”

So, yes, you could put your own kit together if you wanted, but why would you? Kaleta doesn’t mind, though, if you put your own pack together or buy a less-expensive version from another company. “Just get one,” he says. “I would much rather have someone carry a kit, any kit, than not carry a kit. It doesn’t matter whose. The goal of the Micro Trauma Kit NOW! is to change the mindset of everyday carry to include trauma care and to help our boys on the battlefield stay safe.”

But just know, if you get the Blue Force Gear Micro Trauma Kit NOW!, you’re getting the best quality products that a company the size of Blue Force Gear, with more than a decade of connections in the industry, can put together. Learn more now, or purchase the filled kit at www.blueforcegear.com/micro-trauma-kit.