What’s the point of having a flashlight that isn’t charged when you need it? Or the batteries are dead? Or worse yet, having a flashlight that works but is so dim it’s practically useless?
With these 5 high-visibility flashlights we recommend, you’ll never be in any of these situations. Well…you’re on your own as far as providing batteries, but you know what we mean.
SureFire G2X Pro
It’s hard to decide between the SureFire G2X Pro and the Surefire G2X Tactical. Both cost $70. Both are a convenient pocket size of only 1.25 inches. Both are 1 inch in diameter an 5.20 inches long. Both weight 4.4 ounces with batteries. But…the Pro can run at 600 lumens for 1.5 hours on high-output white light while the Tactical can not. The Pro can run for 52 hours on low-output white light. Both come with 2 123A batteries. Click the tailcap to have it constantly on or press for momentary light. Plus, it comes in tactical black but also a bright yellow body color, so you really have high visibility in the form of light and ease of finding it in the dark.
511 Tactical TMT R3MC
Yes, the TMT R3MC is an expensive flashlight at $150, so you definitely don’t want to lose this buddy. But this is the light you’ll want if SHTF. It’s a rechargeable, multi-color Lithium-Ion flashlight that is water-resistant, and provides 357 lumens in a bright beam. Easily switch between steady light or strobing red and blue light. Press for momentary light. Both AC and DC connectors are included and this gem comes with a rechargeable battery pack. It runs for 87.5 hours in low mode or 3.25 hours in high mode. Don’t worry, this is the most expensive one on our list.
LEDLenser MT6
For only $60 you can get this LEDLenser MT6, with 600 lumens for 8 hours or 10 lumens for 192 hours. It’s not rechargeable, but it only takes 3 AA NiMh and it includes a lanyard and sheath.
Pelican SabreLight 2010PL
Another bright-bodied light that is easy to find in the dark, the Pelican SabreLight 2010PL uses three C batteries that are not included. But, for only $86 you get a glow-in-the-dark body and it’s submersible. Twists the body to turn on and off. It is larger than these other options at 13.4 ounces with batteries, but it provides 161 lumens for 21 hours.
Streamlight ProPolymer
Get this Streamlight ProPolymer for the 6.5 hours of run time in high mode. It uses three convenient AA alkaline batteries and can shoot a beam 237 meters. Comes in blakc, orange and yello for high-visibility and is only 7 inches long. Go to the website to find a place to buy.small
At our house, we keep a couple of wind-up and battery-operated flashlights by the door, so we can grab one as we walk in or out as needed. I take one out with me as I walk to the chicken coop if I have to close it up and it’s already dark. You definitely need to be able to find your flashlights in the dark if you need them, so don’t stuff them in the back of a drawer along with your knives and ketchup packets. What’s your favorite flashlight?
Those of you who have been reading this site for a while now know that I have written about and enjoyed a couple other Ron Hood survival videos. Read our review of “Ultimate Survival Guide” and “Advanced Survival Guide.”
His videos are not only funny but full of useful information all in one place. I know you’re going to want to watch these videos over and over again. I got a new one, “Survival Basics I and II,” and I wanted to tell you what I thought of that one as well.
I really liked this one because it covers the first 48 hours after an emergency as well as key things such as staying dry and minimizing heat loss. You may think you already know all there is to know about these basic subjects but somehow Ron hood finds a new angle. I mean, I don’t think I would ever have thought to fill a trash bag with pine needles as a make-shift blanket. The fact that he covers basics also makes these videos a great gift for your kids or your younger prepper friends who are just getting started. It’s great to read a book but watching a video has more richness to it. I only wish we hadn’t lost Ron Hood a few years ago because I think he would have been really great at maximizing the fun of a YouTube channel. There are a lot of those channels now and they’re fun to watch too, but Ron Hood’s personality is part of the appeal of these older videos.
Some of the basics that he covers is firemaking, which you can’t learn too much about in my opinion. The techniques on wayfinding were incredibly valuable. Watch these techniques and take notes in your offline prepper notebook. You can easily tell direction both during the day and at night with the techniques that Ron clearly explains.
It goes over what to include in your own mini kits and maxi kits and all kinds of other things. The coolest things to me were the wayfinding sections with shadows and a watch, and the figure 4 trap looked like something worth trying out. All you need to make a small animal trap is a knife and the diagram of this cool leverage-based trap in your mind. As in the other videos, Ron’s wife Karen helped out with sections on how to clean fish and how to cook maggots. These and other survival videos by Ron Hood and others are available at Stoney-Wolf Productions.
What? Eating that grub doesn’t sound appealing? Well it might keep you alive. I ate a hazelnut grub when I was learning how to prepare acorns (article link on using acorns as a survival food here) and it wasn’t bad! Of course it was small. I’d have a much harder time eating a grub the size of my thumb. I know it’s just a cultural thing though.
I’ve also eaten crickets at a Mexican restaurant and it wasn’t bad, but I didn’t want to look too closely at the eyes, legs and antenna before popping them in my mouth! The people who know that I ate a grub (actually, I ate more than one!) tell me that they would do it only in a life or death situation. They weren’t interested in eating one “just to try it.” So what do you think? Would you actually eat grubs or other insects if you really needed to? If so, here are 4 insects you can eat all year-round. There are nearly 2,000 edible species of insects around the world, and many of them people already eat. It’s not a weird thing.
1. Ants and Termites
There are a wide variety of ants available in all corners of the globe. There are even ants in India that are used to make a lemony sauce! Most ant species are edible. I would avoid fire ants. According to National Geographic, 100 grams of red ants provides some 14 grams of protein (more than eggs), nearly 48 grams of calcium, and iron, among other nutrients. It’s hard to find a credible source online of what specific ants you can eat in the US (plenty of info about the Australian honeypot ant and the Amazonian lemon ant — helpful to know if you’re ever lost in the jungle or on a walkabout. If anyone knows a credible list of ant species that are edible and identification let me know.
2. Earthworms
These are abundant and easy to both harvest and grow. The squiggly creatures can be eaten both raw or cooked–although cooked sounds a lot more pleasant to me. Plus, insects including worms can carry parasites so cooking them lessens your chances of catching something. Suggested preparation is to boil them first to remove the slime, and change the water a few times until it remains clear as you continue to boil them. Then, roast then, fry them, freeze them or dehydrate them. Grind the dried ones into flour. That could be the most appetizing way to consume them. If you can, let them eat something clean like potato or corn meal for a few days before you consume them.
3. Maggots
Not super appealing, but if there’s a dead thing there’s going to be maggots. Many insects that are edible (snails, crickets, grasshoppers etc) are only available in the warm months for most people in the US, so a bug like a maggot is one that you can find all year round. Harvest them from meat that’s been left hanging too long, and spread them on toast.
4. Roly Polys (Sowbugs, Pillbugs)
These critters that roll themselves into a ball are ubiquitous under rocks or rotten pieces of wood. Once you collect a handful of them, boil them. If you can, let them eat something clean like potato or corn meal for a few days before you consume them.
So many of you probably heard about President Trump’s boast on Twitter to North Korea’s Kim Jong Un that Trump has a bigger, better nuclear war button. Well, maybe it’s just coincidence, but the CDC announced just a few days ago that they are moving to prepare health professionals and others on what the public response would be if there was a nuclear detonation. The Centers for Disease Control call their public preparedness sessions “grand rounds.” The last time the CDC offered a grand round on nuclear war was in March 2010.
The latest nuclear grand round will target doctors, nurses, epidemiologists, pharmacists, veterinarians, certified health education specialists, laboratory scientists, and others. The event will be held January 16.
Personally, I’m planning for social breakdowns, electromagnetic attacks leaving the country without a power grid, or a massive earthquake or other natural disaster. Planning for a nuclear devastation seems out of my reach. And personally, I don’t feel that any doctor or nurse, no matter how dedicated they are to their profession, is going to forgo helping themselves or their own family if a massive emergency like that actually takes place. In other words, you’re on your own, IMHO.
But it doesn’t hurt to know what the experts recommend.
Planning for a nuclear detonation
Shelter in Place
First, the CDC recommends sheltering in place for at least the first 24 hours after the event. That step will reduce exposure to radiation. After that 24-hour period, federal, state and local agencies are supposed to mobilize their resources (yeah, right). Go as far underground as you can or into the center of a tall building. Find the nearest brick or concrete building and remain there.
Go Underground
Ready.gov, the official preparedness government site, recommends having an underground area such as a basement to offer more protection from nuclear fallout than what most homes have on the first floor of a building.
Shield Yourself
Use heavy, dense material such as concrete, bricks, and earth. It even suggests using books as a shield? I’m sure they don’t mean holding your college copy of “War and Peace” over your head. But really, I guess that means a library is a good place to be?
If you are caught unawares of the nuclear explosion…
Lay Flat
Lay flat on the ground and cover your head. Stay down because it could take several seconds or more for the blast wave to hit. Once you feel that, take shelter immediately.
Clean Yourself
Wash your body and hair and remove the clothing that you were wearing. Interestingly, the recommendation is to avoid using hair conditioner because it will bind radioactive particles to your hair. Sorry ladies!
Place any contaminated clothing as far as away from your shelter as possible.
Stay Sheltered for Two Weeks
Radiation dissipates fairly quickly. Ready.gov says the fallout poses the most danger for the first two weeks. Look on the bright side, if you happen to be in a library when the bomb goes off, you’ll have lots of reading material. Let’s just hope it doesn’t end up like that episode of Twilight Zone where the guy finally has “All the Time in the World” to read and loses his eyeglasses.
Have an Emergency Kit
No matter what happens or whether you have a shelter or bunker or not, you’ll need food and water. Get it together now, before there’s an emergency. This site has numerous articles about what gear to get and what skills you need to survive nearly any scenario.
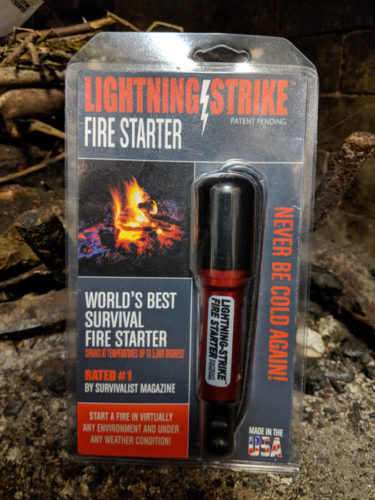
Now that it is mid-November here in the Pacific Northwest we are starting to have some truly cold days. Last weekend we had a hard freeze so I knew that would be a good time to test this fire starter and tinder that Lightning Strike Fire Starter sent us as a tester.
The package calls it the “World’s Best Survival Fire Starter” and that it sparks at temperatures of up to 5,000 degrees. Me and my 10-year-old son gave it a try. He put the kindling on the fire and I let him open the package and figure out how it worked. I figure if a 10-year-old kid can do it then the rest of us can too.
The front of the package.
The back of the package.
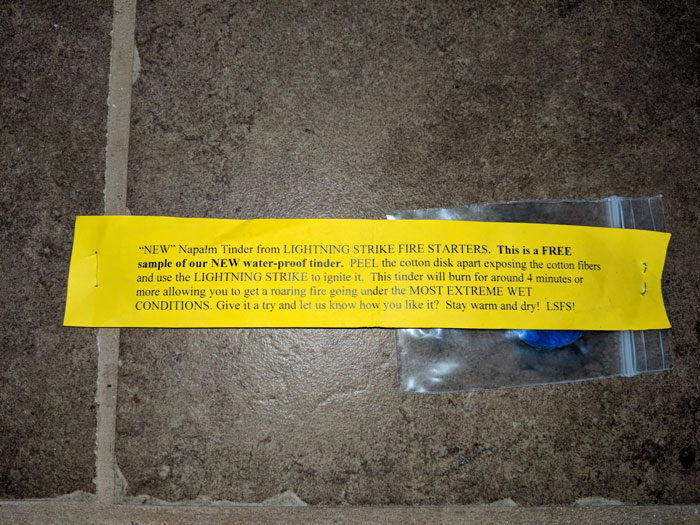
Lightning Strike sent is a plastic bag of two of their Napalm gel tinder pads and we started out with those.
The Napalm gel tinder.
The info that came with the Napalm tinder.
We peeled the gel pads apart and they came into two pieces easily. So even though it’s one pad, you can easily get two firestarters from each pad. They caught fire so easily that I feel if you had good conditions and you had dry tinder you could cut the pads in half or even in quarters and get your fire started with plenty left over for another fire.
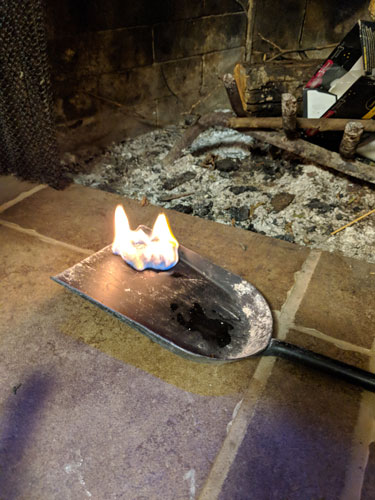
My son read the instructions and set up the striker. I got my camera ready and hovered over his shoulder, unprepared for what would happen next. He ran the striker down the ferrous rod and it sparked and caught the tinder on the first try! I happened to click the camera at just the right time to capture the spark. We were both a little surprised that it started on the first try. It really was that easy! We let it burn for a couple minutes before we put it into our fire. These Napalm tinders aren’t listed on their website, but are available for $12 by phone from the shop by calling 541-439-5155. If you order, ask for them because they really worked great.
The Napalm tinder lit on the first strike.
The Napalm tinder burned quite a while.
Inside the “handle” is a water-proof container that holds the tinder. It comes with 12 tinder pads already loaded in, and refills are available for $12 for 12 tinder pads. A bungee cord holds the components together and it’s palm-sized, or about the size of a mini flashlight, when it’s all together. The cord keeps the tinder cap from being lost. There’s a little string-like thing that allows you to easily pull out the tinder pad.
We tried the tinder pads that it comes with and we had similar good success with that. It didn’t catch fire the first time like the Napalm did, but it only took my son 4 or 5 strikes before it caught. I wasn’t as successful getting a photo of that one as it sparked. In this photo, you can see that one little pad which was not much bigger than a dime opened up into a lot of fluffy material that burned well.
The tinder the Lightning Strike comes with.
The striker and attached tinder kit sells from their website for $60. That may seem like a lot considering that you can go to any camping store and get one of those keychain strikers for a few bucks. The thing that makes this one better is its sturdy construction. The spark is also protected by the machined aluminum case, so it’s easier to strike and keep your tinder lit if its windy or rainy. It holds tinder in its own case, and by my own experience I testify that the tinder caught the spark very well. The case also helps to concentrate the spark at the right spot. If you ran out of the tinder that this comes with, the tinder case would work very well to hold some petroleum-soaked cotton balls (which we wrote about and tested different methods of making in a previous post).
Also, when you buy two firestarters at retail price, Lightning Strike will throw in a free Lightning Strike Tinder Kit (a $12 value) or a belt pouch! And if this is the only fire starter you buy, spending $60 isn’t so bad. I recommend getting one for your home and one for each car you have in your household. It’s peace of mind that’s well worth the price. It would be a welcome stocking stuffer for anyone.
Now that I’ve used it and see how well it works, I’m going to keep mine handy and order a backup of the tinder refills for $12. I’m very happy with this firestarter!
Since we had the fire going, we made some pieces of char cloth, and that’s what I’ll talk about next week.
Lifestraw or some other water filters are great, and if you have one you should use it. But what if you don’t have one?
I knew that you could make a water filter from some basic materials that you probably already have at hand like sand and a 2-liter soda bottle. I tried it out. While it worked, as you’ll be able to see from the photos, I can’t really recommend it as a great solution. The filtered water was barely any better than the muddy water that had been left to sit for a couple days. Let’s see how it worked out…
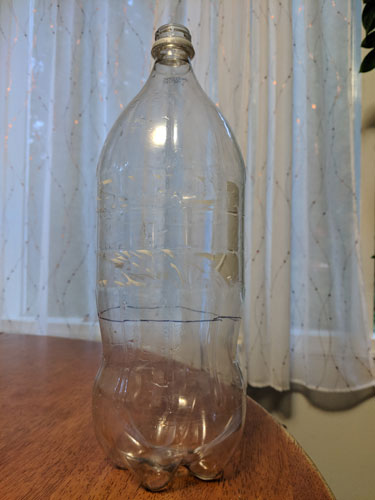
Start by finding an empty water bottle like a small soda bottle or a 2-liter bottle. If those aren’t available, you can use a milk jug or a laundry soap bottle. The idea is something that has a smaller top than it does a bottom. You will want to cut the item in half or collect two items, so that the item with the smaller top is draining into a collection reservoir of some sort.
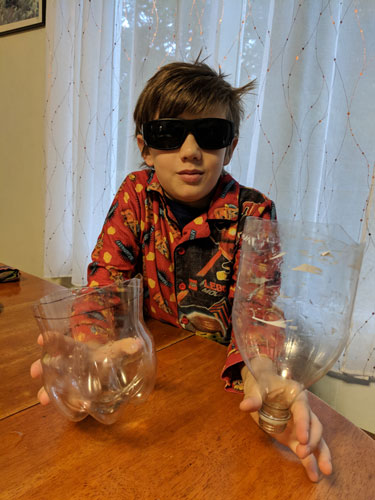
If you cut a bottle in half, the idea is that the bottom half becomes the reservoir for the top half, which is turned upside down in order to be used. Save the cap! Here, my son demonstrates the cut bottle.
Line showing where to cut.
The cut bottle.
Cut a small hole in the cap. This is the water outlet. Some DIY water filters recommend filtering the large sediment through a coffee filter first. You can also accomplish this by filtering the large sediment through a t-shirt. Other DIY water filters will suggest that you tie on the coffee filter to the bottom of the spout, so that the coffee filter is the last filter that the water goes through before you drink it. Either way, it works. Personally I’d rather my water go through the finest filter last. And that also helps keep the sand from slipping through the hole in the lid.
Depending on what you have available, your water filter can have different layers. If you have charcoal from your firepit, you can use some large and small pieces. Pack it down fairly well. On top of the charcoal pour in fine sand, as fine as you can find it. On top of the sand pour in course sand. On top of the course sand pour in gravel. On top of the gravel pour on large gravel or pebbles. You want thick layers of each material.
I used only sand and then larger pea gravel-sized rocks. I put a layer of moss on the top. In some parts of the country you won’t find moss. In that case, you can use a thick layer of pine needles or other tree needles. Here’s mine:
Coffee filter on the bottom, sand, gravel, moss.
Pour your dirty water through the top and let it trickle through into the catch basin. If you’re not sure it’s clean of microbes, use the solar disinfectant method. This involves leaving the water in a clear bottle in the sun for a say or two, to let the solar UV light disinfect it. I’m told it works, although I’ve never actually tested it with giardia water to be sure. If you have, do let us know!
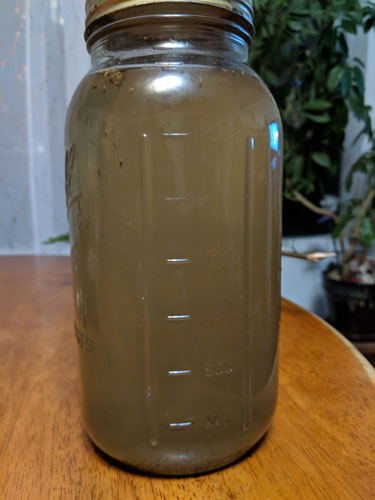
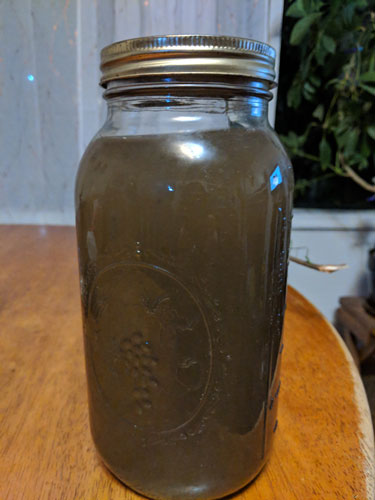
Here’s the water I used. The photo on the left shows the water after it had been left to sit and the sediment settled on the bottom after a couple of days. The photo on the right shows what the water looked like after I shook it all up.
Settled water.
Shaken water.
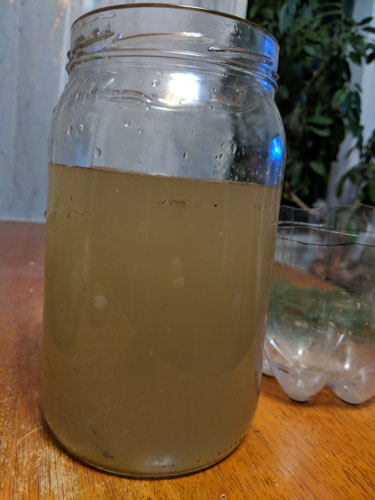
I was actually surprised at how fast the water ran through the sand and coffee filter. I thought it would take a lot longer, but the water ran through fairly freely. Here’s what the water looked like after it had gone through the filter.
Filtered water.
I thought it might be improved by running it through a second time, but that did not make a noticeable difference.
Water filtered a second time.
As you can see from our comparison here, the filtered water was barely cleaner than the water that had settled. Bottom line…use a filter like this if you have the materials at hand and it’s not a hassle to gather the stuff and make it. Otherwise, just let your water site for a couple days if you can. If you’re worried about organisms in the water, boil it before drinking or use your water bottle to use the solar cleaning method. This can work by placing the water bottle in full sun so it heats up the water enough to kill the little critters.
Shaken water.
Settled water.
Filtered water.
I’ve long known that you could eat acorns. I just didn’t know how. I knew that Native Americans relied on acorns as a food source and that they somehow had a way to turn them into flour for little cakes.
I live in an area that has some oak trees, and eventually I became curious about how to actually utilize this resource. As you may know, there are numerous YouTube videos and chapters in books and website pages about processing acorns. The problem is, though, that once I started looking around, I found so much information I didn’t know what was reliable. There are many different ways that you can process acorns to make them edible. I wanted to know what really worked.
The resources I had also didn’t answer some basic questions such as whether it matters if the acorns are green or brown. One of the trees near me had acorns all over the ground, but they were all green. Does it matter if they have their caps on or not? I saw one resource on using acorns as a survival food that said acorn flour needed to be stored in the refrigerator or freezer. How will needing to keep the flour cold help me if I’m in a survival situation?
So when I saw that a group near me was offering a workshop on acorn processing, I immediately signed up. I was one of 10 students who spent most of a day with an instructor from a school of botanical studies (they teach herbalism and wild plant foods). We walked around an area with a lot of oak trees, learned to identify the different native species we have in my area (Oregon), and what the trees’ growth patterns can tell us about the environment. Regardless of what type of trees you have around you, all varieties of acorns are edible!
It’s fine to read books and watch videos, but if you have a chance to learn from a real instructor in person, that is highly preferable. You can ask questions, see, hear, smell and taste in a way that you never can by watching a video, no matter how detailed the instruction. Here’s what I learned about using acorns as a survival food. And to be honest, the acorn “mush” turned out so good that you might want to eat it all the time.
Our group walked around to learn how the trees grow. We learned that Douglas firs and other fast-growing trees compete with oaks for light, and if an oak doesn’t get enough sun over time it will die. Knowing what trees you might need to remove can help you manage oak trees if you want to make sure that the trees in your area stay healthy and keep producing. We also learned that oaks have some years where they just don’t produce much, and some years, called “mast” years, where the nuts are abundant.
Our instructor also reinforced the fact that native people had collected acorns from right where we were walking for thousands of years. It was a great feeling to know that we were learning how to keep this craft alive and that we were learning how to truly eat food on a local level.
After we walked around and talked, we collected our nuts. We learned to avoid acorns that still had their caps on. We picked up only brown acorns, avoided ones that had a hole in them which was due to an acorn weevil (more on that delicious little protein morsel later!) and we avoided ones that were cracked.
Then we got to work processing them. Our instructor let us spend a few minutes cracking fresh acorns before telling us that it would never work to turn fresh nuts into flour! So that’s survival lesson number one…if you want to use acorns as a survival food, plan ahead. They must be dried before you can pound them into flour. You can let them naturally dry over months, you can use an oven, or a dehydrator, or put them by a wood stove. But either way they can’t be used right when you collect them off the ground.
Here are some photos of the dried nuts she had pre-dried for us to use.
As you can see, the whole nuts that you use should be free of mold and yellow or green discoloration. The variation in color is ok as long as they are “clean” looking.
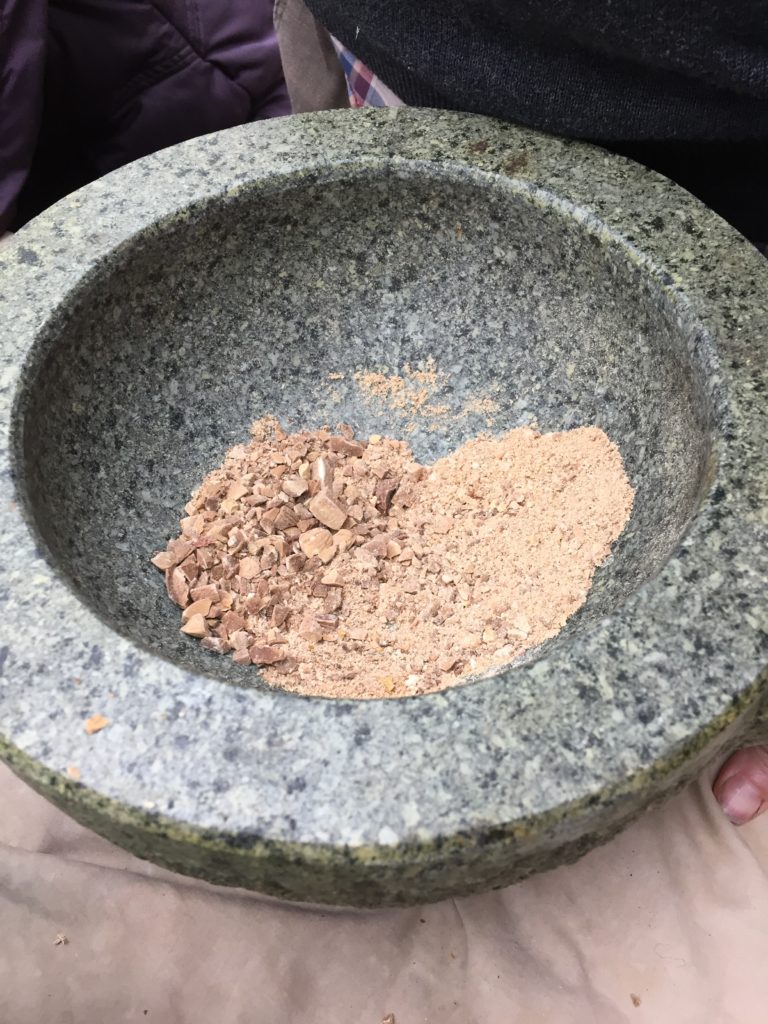
It takes about 20 minutes to pound about 1/2 cup of the nuts into flour using a mortar and pestle. If you use this method, pound, don’t grind. If you grind, you’ll release the oils, which will make it turn into nut butter. Maybe that’s what you want, but in this case we were going for finely ground flour.
If you have a meat grinder, that’s a much faster way to process the acorns. You’ll get some fine flour and some “chips” or “grits” size pieces. Those can be sifted out and finely ground by hand or cooked in a soup. You can also use a grain mill or some other technology if you have it available.
After you start processing your nuts, you’ll sooner or later find one of these acorn weevils. Go ahead and eat it! The little protein morsel tastes like nuts. It’s slightly sweet, and only a tiny bit chewy along the edges. If no one else in your group is willing to eat them, then good, that’s more protein for you. I ate one, and I lived to tell the tale.
After you collect the flour, it’s time to leach the tannins out of the nuts. The tannins are what make them bitter and you want to remove the tannins before you eat the nuts. There are many ways this can be done. One thing I was surprised to learn is that if you try to leach whole nuts (in the shell) it can take months. One person in the class had a brilliant idea of putting a bag of whole acorns into their toilet tank, so they were constantly being “flushed” through with fresh water. You can soak them in a large bucket. This takes months. Longer than you think. But the acorns are fine in the water for a long time. It’s better to store the whole nuts and process them into flour when you’re ready to use them rather than trying to store the flour. The flour won’t stay fresh for very long without freezing or refrigeration.
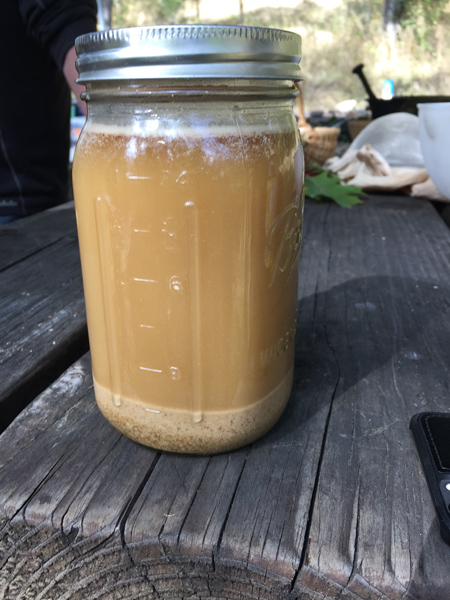
The smaller the acorn pieces, the faster they leach. We leached them in two methods…the first was to put the finely ground flour into a jar filled with hot water (photo 1 below). This could take about a week. You can taste it, and when the nut meal tastes good to you, you can use them. Replace the water when it turns brown. If you have the option, place the jar in a refrigerator because if it is hot out it can begin to ferment.
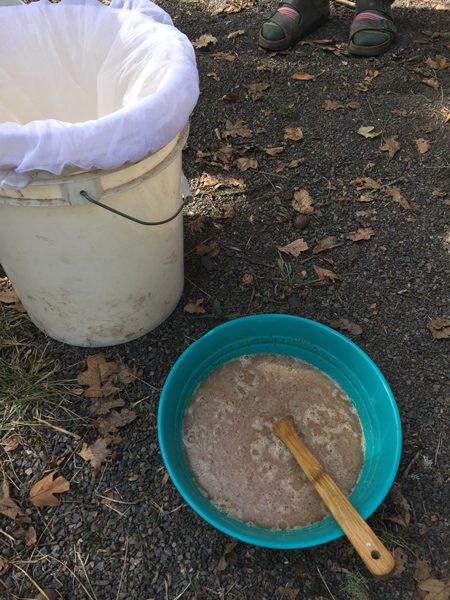
The second way was to put the flour into a bowl, pour water over it to cover and stir, then pour the whole thing through a mesh bag that you can get at a homebrew store (photo 2 below). Pour more water over the flour until it tastes good. You can “hot leach” the acorns by simmering them over a flame or on a woodstove. It can take over a day to leach whole nuts this way.
Photo 1
Photo 2
Our instructor had some already leached flour that we cooked with a little water into “mush.” One cup of flour will expand to about 3 cups of “mush.” The taste was good. It was nutty, but bland. The flavor really woke up when I put some salt on it. If you have any toppings like butter, onions, or salt and pepper, that would make the mush taste much better. But even with no flavorings at all, it was edible and even good, just bland.
Our instructor also had some already-prepared chili that she had made using whole acorns cooked in place of beans. The other ingredients were the same as what you would normally put into chili. The flavor of the chili was great, it was just odd because the nuts oxidized and turned the whole jar of chili a dark, inky black color. If you just focus on the taste and not the color, that too was good! The flour could be made into bread or pasta just as you would use any other flour.
One caution I have is that people can apparently be sensitive to acorns. My partner is allergic to pecans and walnuts, and when he ate the mush, he said it made his tongue feel fuzzy the same way that other nuts do that he can’t eat. So he’s not into using acorns as a survival food because of this. If anyone in your family does have a tree nut sensitivity, you might test it out and see if they can safely eat acorns before you plan for that to be a source of sustenance.
Cooking the acorn mush.
Bottom line…I will collect acorns now whenever I have a chance to. Do your research, read your books and watch your videos. But if you get a chance to learn from an expert, do it. It’s the best way to really master a survival skill.
We talk a lot on this site about gear, survival skills, and general preparedness. But that’s focused on adults. I’m lucky in that my 10-year-old son enjoys and wants to do “survival” type stuff. I trust him with a hatchet. He’s allowed to use some of my husband’s tools like the dremel for polishing and grinding and he likes to make “zombie weapons” by nailing nails into board and stuff like that.
He promises me they”ll only be used on “zombies and humans if I have to,” he says. And I believe him! Why? Because preparedness and self-defense are ongoing topics of conversation in our house that we include him in.
Let’s just imagine for a minute, if you lost track of your child in an outdoor setting, would your child know how to survive and be found alive? I’m not 100% sure my child would be. So I’m going to work on teaching him some of these skills that I consider basic for a child to be found alive.
Situational Awareness
Just knowing that you are coming upon a potentially dangerous situation can go a long way toward saving your child’s life. Practice observing the world around you and engage your child in that conversation. If you see something that you’re keeping an eye on, let your child in on it too. They need to learn what to look out for.
2. Fire Making and Signaling
At this point my son doesn’t have his own bug-out bag but I’m working on making him one. He’s been young enough that he was under the protection of the adults in the house and didn’t have his own gear. But he’s old enough now that he can take on that responsibility. One of the things he knows how to use, and likes to use, is a magnifying glass to start a fire. He also knows that he can take a piece of mirror or glass and make a light that is bright enough to be noticed from afar.
3. Wariness of Strangers
The world is such a different place now than it was decades ago. Now, I no longer consider it safe to go up to any adult who happens to be around and ask for help. Most experts used to tell children to seek out a policeman. But that was when neighborhood officers were commonly standing on streetcorners or cruising down side streets. That’s no longer the case. Children are very unlikely to find a police officer when they are in need of help. The common advice now is to direct your child to look for a woman to help them, and in particular, a mother if they can find one. Statistically, women are more likely to not be a threat and to actually be helpful.
My son has memorized our phone number and address and whenever I’m asked to give it he pipes in and gives it for me. but he also knows not to give that information out unless he really needs to. My son also takes karate, and he believes that he could “take a creep down” if someone messed with him. The reality is though, that no child can overpower an adult unless they get extremely lucky. So they have to rely on their wits and not their bodies.
Teach them about rescue workers. If your child has been taught so strongly to avoid strangers, they may avoid a rescue worker, particularly if the child is very young. The bright lights they carry, the noises, the gear may make the rescue worker look even more frightening. That’s not a stranger to avoid.
4. Stay Put or Seek Shelter
When does it make sense to leave the area where you are and when does it make sense to stay? Try to actively discuss these possibilities with your child. If there’s a structure nearby, or a thicket of trees that can provide some shelter, it might be good to stay. If not, seeking that out makes sense. If they stay where they are and they’re in an outdoor setting, there’s less likelihood if them getting lost, getting injured, or going far away from where they are, which can make searching more difficult.
5. Teach Them How to Use Some Basic Gear
When it is age appropriate for your child, teach them how to use a whistle to attract help. Give your daughter or son a small knife and teach them the concepts of safety with the knife. Pack a small gear bag for your child when you’re hiking, camping or even to have at home. Here’s what is recommended for children:
Card with their emergency information and someone to contact – With everyone keeping numbers in their phone, many children don’t memorize the numbers of important people in their lives. If the phone is dead, they won’t be able to call anyone.
Whistle
Signal mirror
Emergency blanket
Hand warmers – older kids may be able to start a fire safely, but these will help keep younger ones warm.
Flashlight that is durable (in case they drop it) and doesn’t rely on batteries.
Non-perishable snacks
Pouches of water
Basic first aid kit – All kids know how to use bandaids and ointment.
Map of their area – This might help older kids.
Depending on their age you might include firestarter gear, paracord, and other small useful objects like a water filter.
I don’t fly super often, but when I do, I always get anxious about not having any self-protection gear with me. It’s one of the most common topics that comes up here at Shadowfox Headquarters. What non-lethal self-defense gear you can take on a plane is a common question. Let’s look over what you can take on a plane.
First off, before you try to slip something past TSA agents, give this list of “What Can I Bring” from the TSA website a good look over.
The TSA website doesn’t specifically list tactical pens as an allowed or banned item. I have flown with tactical pens in my checked bags, and used them at my destination, then flew back with them in my checked bag. I didn’t want to try carrying it in my carry on bag and risk them taking it. Checking it is a good option, but it leaves you defenseless during the flight. After talking with other people who have flown with tactical pens, I don’t think there’s any consensus on whether or not they will get confiscated. It depends on where you are and the agent and if they have nothing better to do that day or not, it seems.
Millwall Bricks
Carrying on a broadsheet newspaper isn’t a bad idea. You can use it to make a Millwall Brick, so named for its use by the Millwall Football Club in England. Several large sheets of newspapers rolled up tightly and then bent so it’s held in the hand turns the sheets into a solid, hard blunt instrument.
A Roll of Coins
It doesn’t matter if it’s pennies, nickels or quarters. Use whatever fits in your hand.
A Padlock
A basic Master Lock can be held in the hand or strung over a sock or bandanna and swung.
A Flashlight
A sturdy flashlight can not only be a club, it can give you life-saving light if there’s an incident at night or in the dark of a plane cabin.
Your Body
Learn some self-defense moves so you feel comfortable using your hands, knees and elbows if you have to. Enhance your situational awareness skills with these suggestions written by Shadowfox’s firearms instructor.
When you know there’s a storm coming like Hurricane Harvey, you know to expect that there will likely be dangerous levels of rain and at least the potential for flooding. What I’m talking about here is a “flash flood,” which by its very definition is unpredictable. Combine that unpredictability with the force of rushing water and it’s easy to see why flash floods are deadly. So what can you do?
Floods can happen anywhere, anywhere it rains, not just in places where it rains alot. And surprisingly, according to NSSL, the National Severe Storms Laboratory, in the U.S. floods kill more people each year than tornadoes, hurricanes or lightning.
What are the risks of flash floods?
Cities:
Places where there are a lot of roads, buildings or sidewalks (you average city in other words) are at risk for flash floods, because water can’t be absorbed through those surfaces. If there’s a lot of water all at once, it has nowhere to go. City storm drains can’t handle a lot of water all at once.
Riverside environments
It’s nice to live by a river, but these are the areas that are at highest danger of flooding in general. Embankments or levees are built to withstand what is considered a reasonable amount of water, but they might not be build high enough to handle an abnormal amount of water.
Dams
It’s not likely that dam would fail, but not impossible. Again, according to NSSL, in 1889 a dam break upstream from Johnstown, Pennsylvania, released a 30- to 40 foot wall of water that killed 2,200 people within minutes.
Rocky, clay soil
These soils don’t absorb water. The water keeps flowing along because it can’t absorb into the ground.
Very intense rainfall
Try water a plant that hasn’t been watered in dry weather in several days. You might expect the water to soak right in to the soil, but the opposite happens. It runs off. If the soil is already saturated, likewise, the water will have nowhere to go.
Steep mountains or canyons
Flash floods frequently occur after rainfall in canyons areas, where the soil, geography and steep terrain funnel water into one small area.
Can a flash flood be predicted?
A few inches, like 6 inches or even less of fast-moving water, can knock a person off their feet. A foot of moving water can carry you away. And more than that could carry away something as large as a car.
The reason they’re called “flash floods” is because they really CAN’T be predicted with any certainty. The best you can do is keep yourself aware of the factors that can contribute to a flash flood.
Keep an eye on your local weather. If there is a significant rain event, stay aware of it.
Keep yourself informed about local emergencies if you live near a dam.
If you live near a river or near a place where there is a low water crossing, make it your business to stay informed about weather and water conditions.
Is the ground filling up with pools of water? If so, and it continues to rain, that means the soil is getting saturated and there is nowhere for the water to go.
Know the higher ground in your area where you can move to if necessary.
Do not try to walk through moving water. Even if it looks shallow.
Do not try to drive through a flooded road.
Have stored water. If there’s a flood the community’s water supply may not be safe to drink.
Stay out of buildings that have flooded. Water can cause structural damage.
Avoid the mud left over from a flood. It can contain sewage and chemicals.
Be Prepared for Flash Floods
Avoid parking your car near water (rivers/streams) when there is a significant rain event.
Take a page from Hurricane Harvey lessons and get yourself a rowboat, kayak or inflatable raft that you keep under your bed or in your car.
Be aware of the flood warnings:
-a Flood Watch means flash flooding or flooding is possible within the designated watch area – be alert. This is the lowest warning level.
-a Flood Warning means flash flooding or flooding has been reported or is imminent – take necessary precautions at once! Get to higher ground! This is serious!
-An Urban and Small Stream Advisory means that flooding of small streams, streets and low-lying areas, such as railroad underpasses and urban storm drains is occurring. This could be serious!
 It’s hard to decide between the SureFire G2X Pro and the Surefire G2X Tactical. Both cost $70. Both are a convenient pocket size of only 1.25 inches. Both are 1 inch in diameter an 5.20 inches long. Both weight 4.4 ounces with batteries. But…the Pro can run at 600 lumens for 1.5 hours on high-output white light while the Tactical can not. The Pro can run for 52 hours on low-output white light. Both come with 2 123A batteries. Click the tailcap to have it constantly on or press for momentary light. Plus, it comes in tactical black but also a bright yellow body color, so you really have high visibility in the form of light and ease of finding it in the dark.
 Yes, the TMT R3MC is an expensive flashlight at $150, so you definitely don’t want to lose this buddy. But this is the light you’ll want if SHTF. It’s a rechargeable, multi-color Lithium-Ion flashlight that is water-resistant, and provides 357 lumens in a bright beam. Easily switch between steady light or strobing red and blue light. Press for momentary light. Both AC and DC connectors are included and this gem comes with a rechargeable battery pack. It runs for 87.5 hours in low mode or 3.25 hours in high mode. Don’t worry, this is the most expensive one on our list.
 For only $60 you can get this LEDLenser MT6, with 600 lumens for 8 hours or 10 lumens for 192 hours. It’s not rechargeable, but it only takes 3 AA NiMh and it includes a lanyard and sheath.
 Another bright-bodied light that is easy to find in the dark, the Pelican SabreLight 2010PL uses three C batteries that are not included. But, for only $86 you get a glow-in-the-dark body and it’s submersible. Twists the body to turn on and off. It is larger than these other options at 13.4 ounces with batteries, but it provides 161 lumens for 21 hours.
 Get this Streamlight ProPolymer for the 6.5 hours of run time in high mode. It uses three convenient AA alkaline batteries and can shoot a beam 237 meters. Comes in blakc, orange and yello for high-visibility and is only 7 inches long. Go to the website to find a place to buy.small