Let’s say you’re stuck somewhere for the night. Is it better to stay inside your vehicle or take your in-care gear bag and hustle out of there? Much of this choice depends on your own level of training, the gear you have, and the particular situation you’re in.

Being in a car gives a sense of security, because you’re protected from the elements and have some comfort. But . . . there can be detrimental reasons why you would not want to stay in your vehicle.

The vehicle could become a trap. If you’re surrounded by a mob, you might not have a way to get out.

If there’s a broken window, the car will let in the cold outside air. Can you patch up that broken window with a piece of cardboard or an emergency blanket?

The car holds in the cold. Cars don’t hold in heat, so not staying warm is a real concern. If you’re out of the car, you can possibly gather wood and use your fire starter to make a sheltering fire.

The vehicle is conductive metal. It’s a myth that the rubber tires on a car protect a vehicle from lightning strikes. A fully enclosed metal vehicle is safe, as long as you’re not touching any part of the metal frame in the event that there is a lightning strike–this means no touching door and window handles, steering wheels, gear shifts, etc. In order for this to be effective, the windows must be closed. Vehicles can still be damaged by a strike.

Close off part of the space. An emergency blanket doesn’t take up much space and they’re cheap. Get a few extra a keep them in the car. You can use these to close off the back or front of your car’s space to make it easier to stay warm. Plus, you might have extra people in your car (kid’s birthday party? or whatever) and you’ll need more than one blanket just for yourself.

If you have to vacate your vehicle, is your gear accessible? Get your bag out of the trunk and keep it nearby. Ahead of time, sort through whatever’s in there and make sure you know what’s in there and how to use it.

Think through scenarios. Based on where you live and the weather, think through what might happen and what you need. If it’s rainy or hot, think about those things and prepare for them. If you have to cross bridges to get home, think about what you might do if you can’t use the bridge. Thinking things through helps your brain to be more able to maintain when there really is an emergency.

Now that it is mid-November here in the Pacific Northwest we are starting to have some truly cold days. Last weekend we had a hard freeze so I knew that would be a good time to test this fire starter and tinder that Lightning Strike Fire Starter sent us as a tester.

The package calls it the “World’s Best Survival Fire Starter” and that it sparks at temperatures of up to 5,000 degrees. Me and my 10-year-old son gave it a try. He put the kindling on the fire and I let him open the package and figure out how it worked. I figure if a 10-year-old kid can do it then the rest of us can too.

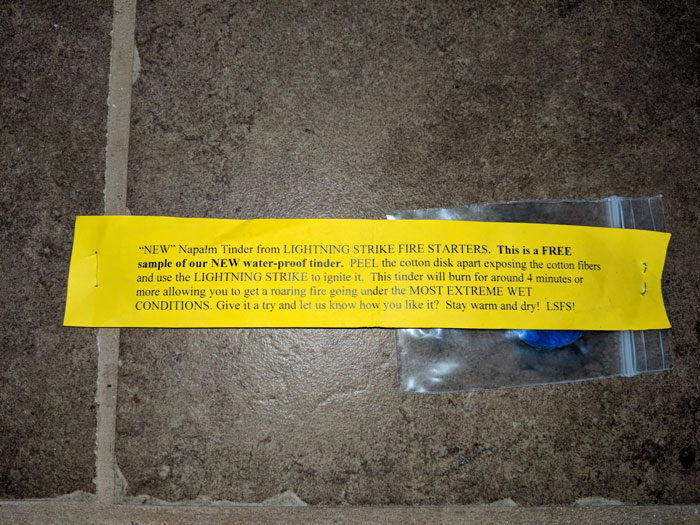
Lightning Strike sent is a plastic bag of two of their Napalm gel tinder pads and we started out with those.

We peeled the gel pads apart and they came into two pieces easily. So even though it’s one pad, you can easily get two firestarters from each pad. They caught fire so easily that I feel if you had good conditions and you had dry tinder you could cut the pads in half or even in quarters and get your fire started with plenty left over for another fire.

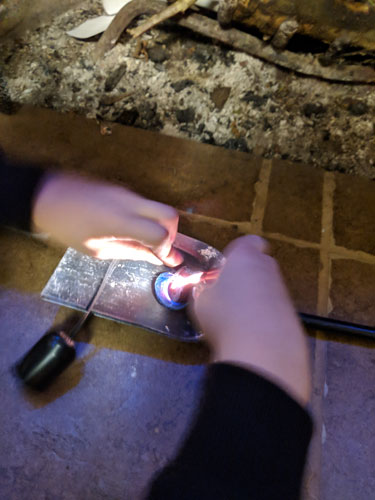
My son read the instructions and set up the striker. I got my camera ready and hovered over his shoulder, unprepared for what would happen next. He ran the striker down the ferrous rod and it sparked and caught the tinder on the first try! I happened to click the camera at just the right time to capture the spark. We were both a little surprised that it started on the first try. It really was that easy! We let it burn for a couple minutes before we put it into our fire. These Napalm tinders aren’t listed on their website, but are available for $12 by phone from the shop by calling 541-439-5155. If you order, ask for them because they really worked great.

Inside the “handle” is a water-proof container that holds the tinder. It comes with 12 tinder pads already loaded in, and refills are available for $12 for 12 tinder pads. A bungee cord holds the components together and it’s palm-sized, or about the size of a mini flashlight, when it’s all together. The cord keeps the tinder cap from being lost. There’s a little string-like thing that allows you to easily pull out the tinder pad.

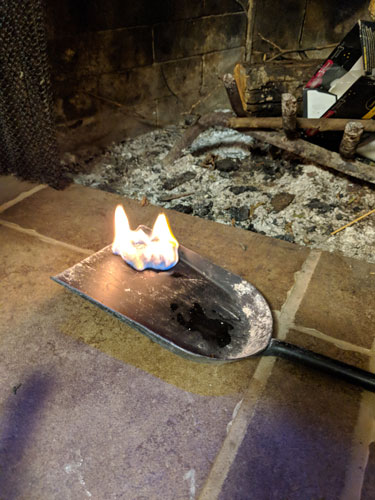
We tried the tinder pads that it comes with and we had similar good success with that. It didn’t catch fire the first time like the Napalm did, but it only took my son 4 or 5 strikes before it caught. I wasn’t as successful getting a photo of that one as it sparked. In this photo, you can see that one little pad which was not much bigger than a dime opened up into a lot of fluffy material that burned well.

The tinder the Lightning Strike comes with.

The striker and attached tinder kit sells from their website for $60. That may seem like a lot considering that you can go to any camping store and get one of those keychain strikers for a few bucks. The thing that makes this one better is its sturdy construction. The spark is also protected by the machined aluminum case, so it’s easier to strike and keep your tinder lit if its windy or rainy. It holds tinder in its own case, and by my own experience I testify that the tinder caught the spark very well. The case also helps to concentrate the spark at the right spot. If you ran out of the tinder that this comes with, the tinder case would work very well to hold some petroleum-soaked cotton balls (which we wrote about and tested different methods of making in a previous post).

Also, when you buy two firestarters at retail price, Lightning Strike will throw in a free Lightning Strike Tinder Kit (a $12 value) or a belt pouch! And if this is the only fire starter you buy, spending $60 isn’t so bad. I recommend getting one for your home and one for each car you have in your household. It’s peace of mind that’s well worth the price. It would be a welcome stocking stuffer for anyone.

Now that I’ve used it and see how well it works, I’m going to keep mine handy and order a backup of the tinder refills for $12. I’m very happy with this firestarter!

Since we had the fire going, we made some pieces of char cloth, and that’s what I’ll talk about next week.

I’ve been thinking a lot lately about how I would handle a traumatic situation. I interviewed Tom Kaleta of Blue Force Gear last week about the company’s Micro Trauma Kit NOW! and why he thinks it’s so important to have these tools on hand to deal with the three most common battlefield injuries: airway injuries, lungs that won’t inflate, and massive bleeding. I’ve always carried a few Band-Aids and a basic first-aid kit in my car, but the need to be prepared for injuries goes well beyond that and I more fully understand that now.

While I’m pondering all this, the publication of Dave Canterbury’s new book, written with the help of Jason A. Hunt, “Bushcraft First Aid: A Field Guide to Wilderness Emergency Care,” is announced. I’ve reviewed Dave’s past two books for this site and I highly recommend them, with some reservations. They are focused on resources on the East Coast, and I’m on the West Coast, so some of the edible foods and tree species he mentions, for instance, are not common here. But beyond that, highly recommended. Read the reviews here:

“Bushcraft Field Guide to Trapping, Gathering & Cooking in the Wild”

“Advanced Bushcraft”

The new book is just what I needed to learn how to take the crucial first steps to being able to help my family or someone I come across who is in distress. Like Tom said in the interview, being able to be a “hero” by stopping someone with a gun who is shooting up a crowd is unlikely, but stumbling across a hiker with a broken leg or a car accident victim is much more likely, and I might actually be able to help them if I had any idea what to do, and the tools to do it with.

If you can, call for first-aid from medical professionals as soon as possible. But if you can’t, follow the procedures in the book using the items you will likely have in a well-planned wilderness bag or advanced first-aid kit. As usual, Dave covers the basics very well, such as remaining calm and being prepared in the first place with the right kind of gear (which he covers). He covers basic powers of observation that you’ll need if you come across an injury scene: see if you can figure out what happened based on situational clues, and making your assessment of the victim. He covers how to safely move a victim, and how to signal for help if you are in a remote area.

Moving into the treatment chapters, Dave covers how to stop bleeding, and how to close a wound using Gorilla Tape. If you don’t have a tourniquet, you can use a piece of rope or paracord and a stick. Gunshot wounds to various body parts and knife and axe wounds are all addressed. Blisters and burns (and trenchfoot) and broken bones are covered in two separate chapters. This isn’t a medical textbook, so Dave doesn’t cover how to set a broken bone. He assumes that you will be providing treatment and then evacuating the patient to get professional medical care as quickly as possible. But I definitely feel that I now have a better understanding of how to deal with broken bones, even a broken thigh bone, by making a traction splint from a walking stick.

Further chapters deal with bleeding and shock, including internal bleeding and heart attack. Chest injuries and breathing (and choking) are covered. He addresses seizures and stroke, and headaches (if you can find willow bark or mint, that can be used to help). Like I said, Dave does a great job of covering the basics. You might not think you need to learn how to do anything to treat a headache, but what about a skull fracture? Dave doesn’t recommend treating many abdominal injuries without professional help as things like open wounds where the intestines are falling out or hernias can be too severe. But Dave does give basic advice that helps you to figure out what to do, such as signs to look for that things are becoming so severe that you need expert help.

After reading this book, you’ll know how to help with allergies or anaphylactic shock. If the issue is too severe to be helped with a basic kit, as with insulin shock (related to diabetes) he will tell you to evacuate immediately. Some of you will want more detailed information about what you CAN do if you CAN’T evacuate, or if you’re dealing with a SHTF situation and there is no 911 to call. In those cases, or if you know you have someone near you with a life-threatening chronic illness such as diabetes, you will have to earn more on your own.

One of the things I really appreciated is that Dave includes medicinal plants along with eight pages of photos. The book ends with a rather lengthy section on plant medicine, which is something I highly recommend everyone learn more about. In particular, learn what plants are in your state, your town, and even in your own backyard. Once you start really observing plants, you will discover that many plants you pass by every day have edible and medicinal uses.

Dave covers things that you might think you already know about, like frostbite or altitude sickness and animal bites (ticks, snakes, spiders). His “real life scenarios” vignettes help you think through what you might do in a real life situation. And what’s great is that many of his observations help you understand a situation more deeply, even if it is something you think you are already familiar with. For instance, did you know that a cucumber smell in the wild means that a snake might be nearby? I didn’t know that before reading this book. Still, pretty much every scenario in the book ends with knowing when to evacuate, or just evacuating at the first possibility. This is not a book for end-of-the-world scenarios where there is no help and you are the medical professional. This is a what to do until you can get to help book.

While it would be helpful to read this book through from cover to cover, an ideal way to use this book would be to keep it in your boat, your hunting cabin, your home bookshelf, in the trunk of your car, and in your bug out bag (or at least photocopies or notes of important sections), so that wherever you are you’ll be able to reference this information.

I particularly find the section on creating my own first-aid kit to be valuable. It lists bandages and dressings, ointments and medications, and tools in a checklist format that can help you be prepared for many of the scenarios in this book. And following Dave’s 10 most important ‘C’s that you need to have will help a lot too:

  1. Cutting tool
  2. Combustion device (fire tools)
  3. Container
  4. Cordage
  5. Cover (blanket)
  6. Cotton material
  7. Candling device (light)
  8. Compass
  9. Cargo tape (duct tape)
  10. Combination tool (multi-tool like a Gerber)

Bushcraft First Aid: A Field Guide to Wilderness Emergency Care, by wilderness experts Dave Canterbury and Jason A. Hunt, publishes June 13, 2017 by Adams Media, a division of Simon & Schuster). I highly recommend this book as a go-to first-aid resource for anyone headed out into nature. Learn more about the book or pre-order it from Simon and Schuster for $17. The book is available in Trade paperback format ($17) or as an ebook for (12). It is 256 pages long.

We recently learned that a Texas woman got stranded in a remote part of Arizona after she ran out of gas during a solo trip to the Grand Canyon. We didn’t hear about this case until after the show about this woman’s rescue aired on 20/20 in March. But it is an interesting example of many survival scenarios coming together along with something we’ve written about before . . . surviving in the desert. (Read: Seven Rules of Desert Survival). How did this young woman do? Let’s check it out.

Amber VanHecke is 24 years old and was stranded for five days. When I was 24 I would have had no idea how to survive,  having given emergency preparation zero thought back then, so she probably automatically did better than I would have at her age. A mishap with Google Maps caused her to go way off track in the Havasupai Reservation and consequently she ran out of gas. You can watch a short, minute-long video of her 20/20 appearance on this Dallas News.com page.

WHAT SHE DID RIGHT:

She prepared for the possibility of being stranded. She had extra food and water with her, including high energy foods like almonds, pumpkin seeds, Goldfish and dried fruit. And she ate only enough to keep from starving. She said her stash of food could have lasted her 18 days. She cooked ramen noodles by leaving them on the dashboard of the car.

She built a HELP sign out of rocks. She noticed that planes occasionally flew overhead. I’m not sure whether her sign was large enough to be visible from the planes, but it couldn’t have hurt.

She parked her car by a man-made structure. This increased the chances that someone would come by the structure, and it provided some shade. Unfortunately, though, this structure blocked the view of her car by the one truck that drove by.

She left a note in her vehicle explaining where she had gone when she left the car. She left the vehicle and hiked an estimated 11 miles to make a 911 call. The call dropped before her location could be pinpointed, but rescuers were able to zero in on an area where they started looking. They found her car, but it was empty. They went down the road the note indicated and found her.

WHAT SHE DID WRONG:

She turned onto a road that didn’t exist. People are leaving nasty comments online about this decision and we admit that this as not a smart choice. After going so far on the initial Google Maps directions and then finding out that there was not a road where it was telling her to turn, that should have been her warning that she was not in the right place. The post she put on her Facebook page about the incident says that she thought the road may have washed away, so she turned anyway thinking she would encounter the road shortly. Instead, she came to a fence with no road in sight. At this point she had also lost her GPS.She backtracked then and found the road she was supposed to be on, but by then was out of gas. If your directions are telling you to turn and there’s no road where it’s telling you to turn, take this as a sign that you are doing something wrong.

WHAT YOU SHOULD DO:

  • Approximately 80 percent of people who get lost are day hikers who did not plan for emergency situations.
  • Before you go out on a trip, tell someone your planned route. If you get off course like this, chances are you will be in an area close enough to your planned route that someone will have some idea of where to look for you.
  • If you’re in the desert, or truly, anywhere where there is harsh summer weather, always take extra water. You can’t survive without water and you may use all of your physical reserves looking for it.
  • Carry an emergency blanket. In the desert, temperatures drop wildly at night and rise high during the day.
  • Bring sunscreen and protective clothing such as hats and long sleeves.
  • Bring something to signal with, like a mirror, whistle or something brightly colored.
  • Carry a first-aid kit with basic supplies.
  • Rest. Conserve your energy as much as you can.
  • Keep a positive mental attitude. Keep something in your pack or car, like a deck of cards at a minimum, that can help you pass some time.
  • Keep a notebook and pen in your car so you can leave notes, as Amber did.

Image from Associated Press showing the positioning of Amber Van Hecke’s car by the silo and her HELP sign made of rocks.

You may think you have a gun or two at home and you know how to use it. That makes you feel pretty good about protecting your home in an emergency. Not that we don’t think having a gun and being prepared to use it is a good idea. But there is more to think about than just pointing and shooting.

The biggest scare for us is protecting our home and family in the event of a real emergency. We feel prepared, and we don’t mind sharing our resources with other people that we can trust, but we don’t want our resources and our careful planning to be taken away from us because we can’t protect what we’ve got. We’ve been thinking about ways to “get tactical” with our home protection, and that means thinking of the home and property as a “war zone.”

Look at your home and property the way a military unit would. When a military unit is protecting an area, each solider knows what he or she is responsible for. Each person has a job to do and an area that they are covering. Consider assigning your family and your trusted friends a “sector” to guard. Physically mark out boundaries with some marker, such as a planter, stake, or rocks, if need be. The sectors should not overlap in the sense that you don’t want one person covering sector A inadvertently shooting at someone who is guarding sector B. Each “guard” should be able to focus on their section and not worry about looking over their shoulder. Make diagrams if you feel that you need to so that each person knows what “Wedge” of the property they are responsible for.

Evaluate your view from inside and outside. Go around to each window and door of your house and carefully evaluate what you can see, what a person looking at your house can see, and what things such as trees might be blocking your view.

Think about how your view will be different in night time. You likely won’t see someone coming. You could consider putting out some early warning devices, automatic lights, or traps that you can conceal and not activate until the event of an emergency. You don’t want everyone on your street to know that you have an automatic light that comes on just when someone reaches the tree 40 feet from the left flank of the home, do you?

Pace out the distances to sheds or other outbuildings on your property so you can tell your team how far to go in a certain direction, if need be.

Thinking about traps? Consider key points of attack from the attackers point of view. If there’s a key tree you know provides cover for someone approaching the front door, consider where an appropriate place for a trap or early warning device might be in that area. Make sure you put this information on the sketches for your guards.

Create a barricade location. You may choose to keep a separate firearm or other weapon in your barricade location. If it’s a room, stock this area with some basic supplies. Your barricade location could be a general “safe room” which is protected by a solid core door and a deadbolt on the inside. Large heavy furniture in the room can provide cover, or you could invest in some kind of hard-core closet door that can’t be easily brought down. This way, the room looks fairly “normal” to outsiders but you know it provides a high degree of protection. Inside the closet should be some way to communicate with the rest of your team or with authorities if that is possible. This is also an excellent way to protect yourself in the event of a home invasion.

Outside your home, consider a good fence. A sturdy fence that people can’t see through, but you can, can go along way to deter any sort of invasion. Chain link is also good, because it’s sturdy but you can see threats coming.

Reinforce your windows and doors. Specially designed bars or braces can go in some windows and sliding glass doors. Hurricane shutters can be closed off in the event of bad weather or any other threat.

Also, consider a good guard dog. We’re not in favor of dogs that menace the entire neighborhood, but a well-trained dog that knows its boundaries and will respond to your commands can scare off many potential threats. If you have a dog, make sure you consider your dog’s needs in your preparation plan and have extra food, water, medication, etc on hand for your companion animal.

September is Emergency Preparedness Month, where agencies try to get the word out about families and individuals being more prepared to handle social emergencies and natural disasters. We at Shadowfox would like to join in the chorus and encourage you to do something this month to make yourself and your loved ones more prepared.

Just one thing will move you a step closer to self-reliance. That could be as simple as buying a canner and jars, so you’re more able to preserve your own food. Or it could be a major step such as buying a generator. Wherever you are in your prepping, take one step closer and you’ll sleep better.

To help, we’ve compiled a list of our own resources along with websites where you can get more information. What’s the one step you will take this month?

1. Download an App or Sign Up For Texts
The Red Cross has a page of downloadable apps that cover various emergency and survival scenarios, such as first aid or earthquakes. Depending on where you are, you may want to get the tornado app, the hurricane app, or the general emergency app that covers more than 35 different alerts.

2. Make a Kit or Make Your Kit Better
The Red Cross suggests having a kit with a 3-day supply on hand for emergencies. We know, however, that if there is a major earthquake event in the Pacific Northwest, services will be unavailable for possibly months at a time. If you don’t have a kit, start by making a 72-hour kit. If you already have a 3-day kit, add a day to it for each person in your household (and your pets!).

3. Become Trained As a First Responder
Experts have said that if a real SHTF emergency goes down, policemen and ambulance drivers may not be available because they’ll be trying to help their own family. If there’s a severe natural disaster, ambulances and fire trucks may not be able to drive down the street or cross bridges, or if they can, they may have too many emergencies to respond to to help you with your emergency. Moderately sized cities of a couple hundred people may only have a handful of ambulances–definitely not enough to cover a city-wide emergency. Train yourself to help yourself and your neighbors, because you may be the only person who can.

4. Make a Plan
Talk to your family and neighbors to come up with a plan for what you will do if an emergency goes down while you’re at work, at school or out of town. The Red Cross has information on making a plan.

5. Figure Out How You Will Communicate
This Shadowfox article offers five realistic ways that you might have to try to communicate in an emergency. Communicating by walkie talkie might work, but only if you actually have walkie talkies, so go ahead and get them. Maybe now’s the time to get your Ham radio license.

6. Evaluate Your Water Sources
From hidden water sources you never thought of to gathering water from the roof of your house in a pinch, water is one of the necessities you will have to plan for if you can no longer get water from the tap.

7. Prep Your Car
Most of us probably feel that if we’re at home in the event of an emergency we’ll be doing ok . . .  after all, that’s where our food, clothes and tools are. But if we’re at work or at the movies when something goes down we will have only what’s in our car, and we may need to spend a night in our vehicle until it’s safe to move out. Prepare your vehicle for emergencies with basic car repair tools and an emergency kit that is always in your car. Keep a good pair of walking shoes in your vehicle. Sometimes I wear heels to work, but I keep a trusty pair of cowboy boots in my car so I never have to walk in my “fancy” shoes.

8. Consider Survival Essentials
There’s a basic 10 list of items that survivalists recommend people have. This includes basics such as a knife, lighting source, and firestarter. Evaluate what you have against our expert’s list of 10 essentials plus more that you can include to go beyond just the basics.

9. Protect Your Home
If the power goes out, so will your alarm system, your lighting, your stove and your ability to charge your phones. Be prepared by thinking through how you will protect your home in a power outage.

10. Be Aware, Be Vigilant
The most important thing that you can do is be aware and be vigilant. Always take stock of your surroundings and know, for instance, where exits are if you’re in a building, or what roads to avoid if you don’t want to cross over bridges. Be vigilant in making sure that you always have things nearby that can protect you and your loved ones if you need to.

The “survival pod” is a unique capsule designed to withstand any type of disaster. At least, this is what inventor and CEO of Survival Capsule, Julian Sharpe, claims.

The survival pod is made of metal, is covered in an aircraft-grade aluminum shell and is lined with a ceramic thermal blanket. It fits two people and comes furnished with harnessed seats, medical kits, air tanks, food and water.

Survival pods are being marketed as structures capable of riding out anything, including a tsunami, hurricane, earthquakes, storms or other major natural disasters. The key is jumping into them quickly enough to avoid the danger.

Sharpe explains that the capsule’s goal is to help people “ride out the tsunami rather than evacuate.” The invention is meant to be “installed in people’s garages or on a flat roof and tethered to a solid structure, meaning the capsule then becomes your shelter during the post-tsunami phase.”

Additionally, Sharpe describes the survival pods as a time-saver for rescue teams so that it can “allow them to focus on the critical casualties.”

Julian Sharpe studied at Loughborough University before pursuing a career at British Aerospace. He looks forward to seeing his invention become a life-saving aid.

As Daily Mail reports, the survival capsule features two small porthole windows so the occupants can see what’s going on around them. There are safety seating with four-point harness straps, storage space (sufficient for a 5-day supply per person), water storage, basic internal light, GPS (Global Positioning System), air supply tanks, solid, watertight marine door (opens from inside and outside) and marine standard window.

The capsule is said to be an alternative to families instead of “safe houses.”

Preppers can get these survival capsules in different sizes; they range from “two-person capacity, for family homes, all the way up to a 10-person capacity, which could be used for businesses and schools.”

If you want to go all out, the capsules can be customized to include surround sound music and the addition of a toilet.

Costs for the survival pods haven’t been revealed by the company, but pre-orders are being taken on its website.

Image courtesy of Survival Pod.