Some fire starter systems rely on char cloth. I wrote about the fire piston that I bought a while ago as one of some backup fire starter systems to have on hand. I like the fire piston, but it requires some type of tiny piece of tinder and char cloth is recommended. You can buy char cloth online for relatively inexpensively. But I’m here to show you how easy it is to make your own. I bought some online for about $7 and then paid $5 or so for shipping, so with these instructions here you can save that money and make a lot more char cloth than what you could buy for that amount of money.

Even if you don’t have a fire starter system that relies on char cloth, it’s still nice to have char cloth on hand. It catches fire easily and a large enough piece can stay lit long enough to get your other tinder alight.

Char cloth is made through a process called pyrolysis. this means that the material has been heated without the presence of oxygen, so it stopped short of burning up through combustion (which requires oxygen to occur). Because the material has been partially burned already, it catches fire readily and smolders with a low flame that makes it ideal for fire starting.

First things first … gather your materials. You need:

  • 100% cotton fabric. I went to the thrift store and looked in the men’s section until I found a 2 XL 100% cotton t-shirt and bought that for a couple of bucks. 100% cotton denim jeans can also work, but because the fabric is thicker it will take longer in the fire and you’re slightly more at risk that your material will combust rather than burn through pyrolysis.
  • a sealable tin like an Altoids tin or metal bandaid can. I had a small cigar tin that I’ve been holding on to for the purpose of making char cloth.
  • scissors
  • You need a fire that’s already going.
  • tongs or something to get your hot tin out of the fire.
  • That’s it.

The size of the piece you can make is dictated by the size of your tin. A larger tin holds a larger piece of fabric. Cut your fabric to the size and shape of your tin.

Making your own char cloth
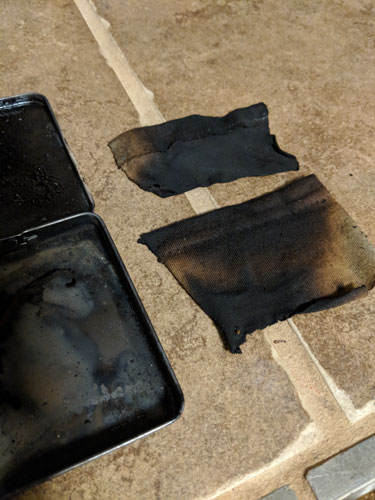
The unburned tin and the unburned 100% cotton fabric.

Most of the instructions will tell you to poke a tiny hole in your tin. This tiny hole allows the gases to escape without allowing oxygen or flame to get into your tin and burn up your material through old-fashioned combustion.

I made my first piece of char cloth in a tin with no hole at all, and it worked very well and in only 30 seconds or so. The other pieces I made after poking a tiny hole in my tin and I found that the pieces took longer to burn up completely. Try it first without a hole and see how that works.

The point of the hole is that you’re supposed to be able to remove the tin from the fire when there’s no smoke coming out of the hole. But if there’s other smoke in your fire (as there usually is) and it’s a very tiny hole, it’s pretty hard to tell if there’s smoke coming out or not. Some people make their char cloth on a smaller flame like a candle or a sterno flame and if you do that, you could see the smoke coming out.

If you have no hole, check your char cloth after 30 seconds. If you have a small tin, this may be long enough. Let the tin cool before opening, or else use tongs or something that allows you to open it without burning yourself.

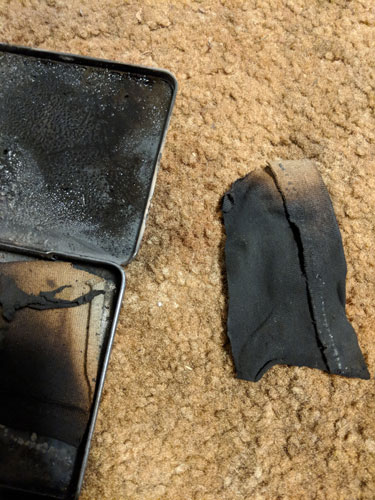
I found that my tin wanted to pop open when it started to get hot, so I needed to make sure the tin lid was pushed on well. After the tin is cooled, open it, and you should see that your 100% cotton fabric has turned black, shrunk a little, and becomes fragile but not ashy.

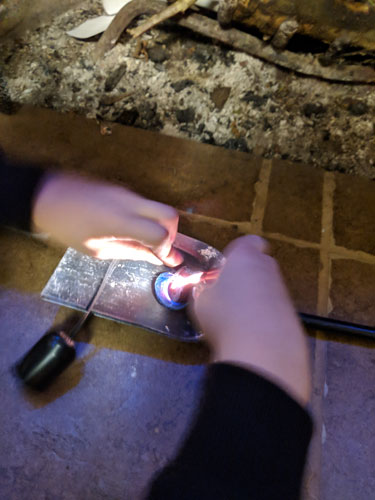
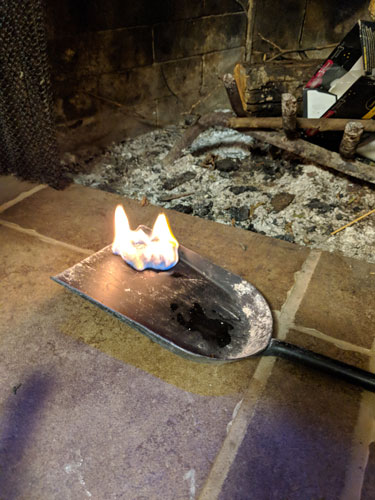
Here’s my son seeing how a piece of our char cloth burned.

Making your own char cloth
The char cloth slowly smolders rather than burns quickly.

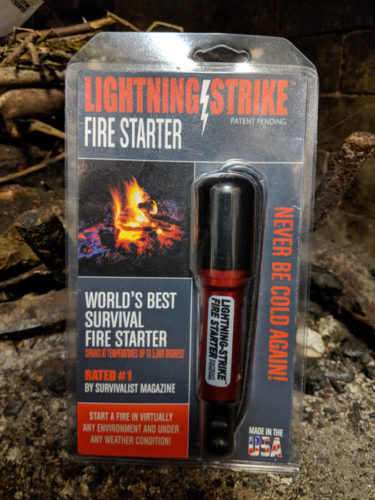
Now that it is mid-November here in the Pacific Northwest we are starting to have some truly cold days. Last weekend we had a hard freeze so I knew that would be a good time to test this fire starter and tinder that Lightning Strike Fire Starter sent us as a tester.

The package calls it the “World’s Best Survival Fire Starter” and that it sparks at temperatures of up to 5,000 degrees. Me and my 10-year-old son gave it a try. He put the kindling on the fire and I let him open the package and figure out how it worked. I figure if a 10-year-old kid can do it then the rest of us can too.

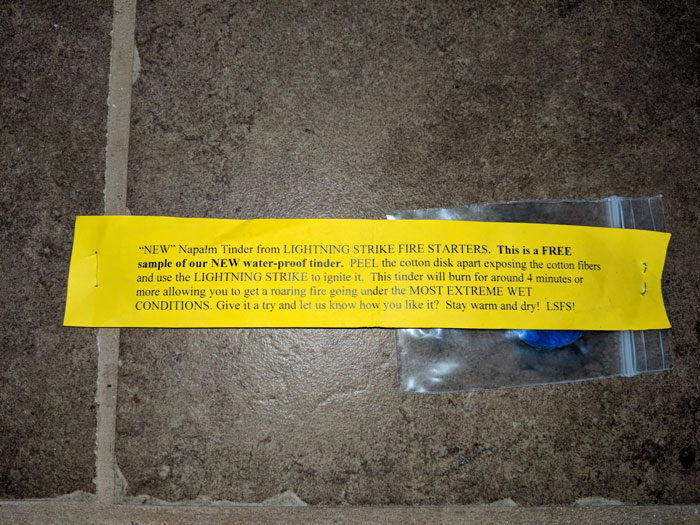
Lightning Strike sent is a plastic bag of two of their Napalm gel tinder pads and we started out with those.

We peeled the gel pads apart and they came into two pieces easily. So even though it’s one pad, you can easily get two firestarters from each pad. They caught fire so easily that I feel if you had good conditions and you had dry tinder you could cut the pads in half or even in quarters and get your fire started with plenty left over for another fire.

My son read the instructions and set up the striker. I got my camera ready and hovered over his shoulder, unprepared for what would happen next. He ran the striker down the ferrous rod and it sparked and caught the tinder on the first try! I happened to click the camera at just the right time to capture the spark. We were both a little surprised that it started on the first try. It really was that easy! We let it burn for a couple minutes before we put it into our fire. These Napalm tinders aren’t listed on their website, but are available for $12 by phone from the shop by calling 541-439-5155. If you order, ask for them because they really worked great.

Inside the “handle” is a water-proof container that holds the tinder. It comes with 12 tinder pads already loaded in, and refills are available for $12 for 12 tinder pads. A bungee cord holds the components together and it’s palm-sized, or about the size of a mini flashlight, when it’s all together. The cord keeps the tinder cap from being lost. There’s a little string-like thing that allows you to easily pull out the tinder pad.

We tried the tinder pads that it comes with and we had similar good success with that. It didn’t catch fire the first time like the Napalm did, but it only took my son 4 or 5 strikes before it caught. I wasn’t as successful getting a photo of that one as it sparked. In this photo, you can see that one little pad which was not much bigger than a dime opened up into a lot of fluffy material that burned well.

The tinder the Lightning Strike comes with.

The striker and attached tinder kit sells from their website for $60. That may seem like a lot considering that you can go to any camping store and get one of those keychain strikers for a few bucks. The thing that makes this one better is its sturdy construction. The spark is also protected by the machined aluminum case, so it’s easier to strike and keep your tinder lit if its windy or rainy. It holds tinder in its own case, and by my own experience I testify that the tinder caught the spark very well. The case also helps to concentrate the spark at the right spot. If you ran out of the tinder that this comes with, the tinder case would work very well to hold some petroleum-soaked cotton balls (which we wrote about and tested different methods of making in a previous post).

Also, when you buy two firestarters at retail price, Lightning Strike will throw in a free Lightning Strike Tinder Kit (a $12 value) or a belt pouch! And if this is the only fire starter you buy, spending $60 isn’t so bad. I recommend getting one for your home and one for each car you have in your household. It’s peace of mind that’s well worth the price. It would be a welcome stocking stuffer for anyone.

Now that I’ve used it and see how well it works, I’m going to keep mine handy and order a backup of the tinder refills for $12. I’m very happy with this firestarter!

Since we had the fire going, we made some pieces of char cloth, and that’s what I’ll talk about next week.

To make a really good fire starter you only need a little bit of time and two ingredients…petroleum jelly and cotton balls. Well, we tried the method three different ways to test out how well it actually worked.

We used cotton balls, which are the standard advice told to people to use, and we also used cotton pads. We also fully soaked some pads and balls and left some balls just lightly coated to see the difference in how they performed.

To make petroleum-soaked fire starters, the typical advice is to melt petroleum jelly slowly and over a small controlled flame. The whole point is that the petroleum jelly (aka Vaseline) is flammable, so you have to be careful when melting it. Well, to get over this hurdle and to avoid using fuel to make fire starters, I put out a container of petroleum jelly that only had about an inch of PJ left in the bottom on a table in my yard on a day that was projected to get to 100 degrees. I figured the heat from the sun would melt it just fine without me having to do anything else to it.

And it did. That worked fine. I put it out there at 11am and at 2pm it was liquidy but not totally melted. Since I know that the late afternoon hours are the hottest part of the day, I just waited a little longer. by about 4pm the PJ was melted enough that I knew it would work. I happened to have a bag of cotton balls in my cupboard along with a bag of cotton pads. The cotton pads are about an inch and a half in diameter and round. I had the idea that the pads would work better than the balls, and also allow me to stack them and possibly put more in my tin that I could with the balls. I tried both.

I took a pair of tweezers and dipped the balls and the pads in the PJ and then removed them onto a piece of wax paper to harden. One of the mistakes I made was letting some of the balls soak up WAY too much Vaseline, but I also thought this might have some advantages.

I used enough pads and balls to use up all the melted PJ and then when the melted stuff was soaked up I took some pads and balls and wiped them around the inside of the PJ jar to get all of it up. Since it was going to be super hot over the next few days, I put them in the freezer on the wax paper to fully harden up and to leave them there until I could go back and deal with them again.

The first one we lit (we being myself, my partner and our 10-year-old) was a fully soaked cotton ball. It did take more to get it started, but it burned for about three times as long as the dipped cotton. So, the advantage here is if you have a reliable flame source like a match or lighter, and your tinder is slightly wet perhaps, fully soak your cotton balls because you’re going to get a stronger flame that is going to last longer to get everything else going.

The typical advice is to just DIP the balls into the PJ and not SOAK them in the PJ because the idea is you want to be able to “fluff” up the cotton ball to be able to expose the cotton inside as the tinder to catch your spark. This will definitely be the best approach if you are using a handmade fire starter like a flint and steel or something where you’re going to have to work hard to get a spark and you want it to catch right away. In our test, the dipped cotton ball lit up right away but did not burn very long. In this video you can see that the less soaked ball lit up right away but the flame is not nearly as intense. This video also shows us using the flame to light one of the pads, to see how that one goes along. You can see that as soon as the wax paper it was on touches the flame it burns away and then the pad catches.The video ends right when the pad catches, but it burns for 10 minutes more beyond what you see here.

The third test was a cotton pad. These absorbed a lot of PJ so I didn’t bother trying to fluff it up. It started faster than the fully soaked ball and, here’s what I got excited about…it burned for even longer than the fully soaked ball. The pads are woven, and they are in two layers with a little air space in between, The circular nature of the pad and the size of it, and I think, just the woven structure of the cotton in general, kept it burning for a lot longer. I also liked that it was flat, as opposed to round like the ball. I felt that gave me more stability as it was resting on the surface, so I wasn’t worried that it would roll away or something like that.

When it was time to remove the soaked pads and balls from the freezer, I placed each pad in a small piece of clean, new wax paper that I wrapped around it and then placed in a round plastic container. This was so they wouldn’t stick together. I placed a layer of the balls on top and then closed the lid. I had some balls that didn’t fit, so I placed those in an Altoid tin. The was paper that the fire starters were on had some PJ on it still, so in order to not waste that I rolled it up and then cut it into sections that I also stuffed into the tin. These will work for fire starting too.

Bottom line, the PJ soaked balls are a great fire starter, I’m not sure I’d say they are the ultimate though. I really liked the pads.

If you’re like me, you like to have a back-up and then a back-up back-up. Every method of starting fires has their pros and cons. Let’s look at a few things to think about when you’re worried about starting a fire.

Magnesium Scraper

These work well, but you have to use more magnesium to get your fire started than most people think you do. These can work even when they’re wet. While the bars are small and easily portable, they will wear out fairly quickly and then what will you use?

Flint and Steel

Starting a fire with a flint (an actual piece of flint rock) and a steel takes practice. The good thing about this is that the flint lasts a long time provided you get a good sized chunk of it. The steel should last a long time too.

Sticks

Yes, there are people out there who can make fire this way, but I’m not one of them. I don’t mind trying it out during the Mountain Man demonstrations just for fun, but I’m not going to rely on this method in a survival situation. If you do, great. Not for me.

Fire Pistons

I ordered one of the fire pistons from Rose Mountain Fire Pistons (looks like their website is messed up now) after reading an article in some outdoor magazine several years ago about how reliable and easy to use they were. Well, I’d say they are reliable, but again, using this method takes practice. The videos of the guy who makes them show him getting a healthy spark from just one plunge of the piston. It doesn’t work that well for me.

Here’s what these are…there are several brand and makers of these fire pistons but I chose this company because it’s a good price and it’s handmade. The woodwork is beautiful and it’s a nice piece that I admire. They work by putting a piece of tinder (char cloth is recommended) in the special holder tip and then you rapidly plunge a piston down to super heat and compress air. That causes the char cloth to catch fire. You tip the spark out of the piston and into your tinder pile. You are supposed to lightly lubricate the piston before using so it glides smoothly. I figure a small container of petroleum jelly would last a good long while and if I ran out of that, why I’d just use squirrel fat or something.

I get frustrated with it because it takes me a lot of tries, but I do eventually get a spark. I kind of consider this my back-up back-up, because I know that as long as I have some easily flammable material that I can stuff in the end of the piston and a pile of dry tinder, I should be able to use this thing for a long time.

Lighters

I keep a few lighters here and there around the house and in the car because I think that’s the easiest way to get a fire started. If you keep lighters in your bug-out bag, place a few in a waterproof bag. The nice thing about lighters is that they are cheap and lightweight. But the cheap ones break. They don’t work well when it’s windy. And if they get wet, forget about it.

What do all of these fire starter methods all rely on? Dry tinder! It doesn’t matter how many matches you have, if everything you’re trying to burn is wet, you’re not going to get a fire. Ensure your success by gathering materials that will almost guarantee that you can get a fire started. Now that the weather is warming up, make it a point to go out and stock up on moss, bark, grass, and whatever else you can stockpile. Keep it in an Altoid tin or an actual tinder safe in a dry bag. Some alcohol gel could also be a good thing to have too.

Cheetos

Yes! I took a chemistry class in college and we each burned Cheetos to measure how much heat came off of them and into water we were trying to boil. I had never thought much at that point about emergency preparedness or survival gear but the site of that single Cheetoh burning for almost two minutes straight stuck with me.

These things are made of so much oil that they actually burn easily and stay lit. Consider stashing a bag of them in your kit or in the glove box. It doesn’t matter if they’re stale or not. They burn and they burn well.

Steel Wool

Get the finest grade of steel wool you can and use that as your tinder. It goes up almost immediately. Keep a 9 volt battery around and touch both poles of it with the steel wool and you have an instant inferno.